How Can I Make Botanical Oils Like Avocado, Olive, Lavender, and Peppermint at Home?
You might look at a bottle of lavender oil and think creating it yourself is out of reach. From my own shelf of home-infused oils, I can tell you the process is a gentle, accessible craft that connects you directly to the plants.
This article will show you that successful homemade oils rely on matching the right simple method to each plant material.
- Choosing between infusion and expression methods
- Preparing botanicals like herbs, fruits, and seeds
- Selecting and using safe carrier oils
- My personal tips for potency and storage
What You’re Actually Making: Infused Oils vs. True Essential Oils
Let’s clear up the first big point of confusion. When most folks think about making lavender or peppermint oil at home, they’re picturing two completely different processes.
An infused oil is what we can safely and practically create in our kitchens. You take a neutral carrier oil, like olive or jojoba, and steep dried plant material in it for weeks. The oil gently pulls out the color, some scent, and the fat-soluble therapeutic compounds from the plant.
Think of it like brewing sun tea, where the water takes on the flavor of the tea leaves, but here the oil is capturing the essence of the herbs.
A true essential oil is a highly concentrated aromatic liquid. It’s not an oil at all in the fatty sense. It’s created by passing steam or water through massive amounts of plant material to capture the volatile compounds, which then separate from the water.
This requires specialized, expensive equipment and pounds of plant matter. So, can you make real lavender essential oil at home?
The honest answer is that true steam distillation for pure essential oils is incredibly difficult and often unsafe to attempt without proper training and equipment. For our purposes, focusing on infused oils is the smart, accessible path. If you’re curious about home-friendly options, we’ll cover the best methods and simple recipes for making herbal infused oils at home in the next steps.
Here’s a simple guide for when to use each:
| Reach for Your Homemade Infused Oil When You Want… | Buy a Quality Essential Oil When You Need… |
| A gentle, ready-to-use oil for massaging into skin or hair. | Powerful aromatherapy benefits from just a drop or two in a diffuser. |
| A culinary ingredient, like rosemary-infused olive oil for bread. | A highly concentrated scent for natural cleaning products. |
| A simple, safe first-aid salve for minor skin irritations. | Specific, potent therapeutic effects that require precise dilution. |
The infused oil on my shelf, a calendula and olive oil blend, is my go-to for soothing my hands after gardening. The tiny bottle of peppermint essential oil next to it is reserved for adding a single, invigorating drop to my foot cream.
Gathering Your Tools and Choosing Your Base
You likely have most of what you need already. This isn’t about fancy gear, it’s about clean, simple tools.
Here is your basic equipment list:
- A very clean glass jar with a tight-fitting lid (a mason jar is perfect).
- A fine-mesh strainer or sieve.
- Several layers of cheesecloth or a thin, undyed cotton cloth for a final filter.
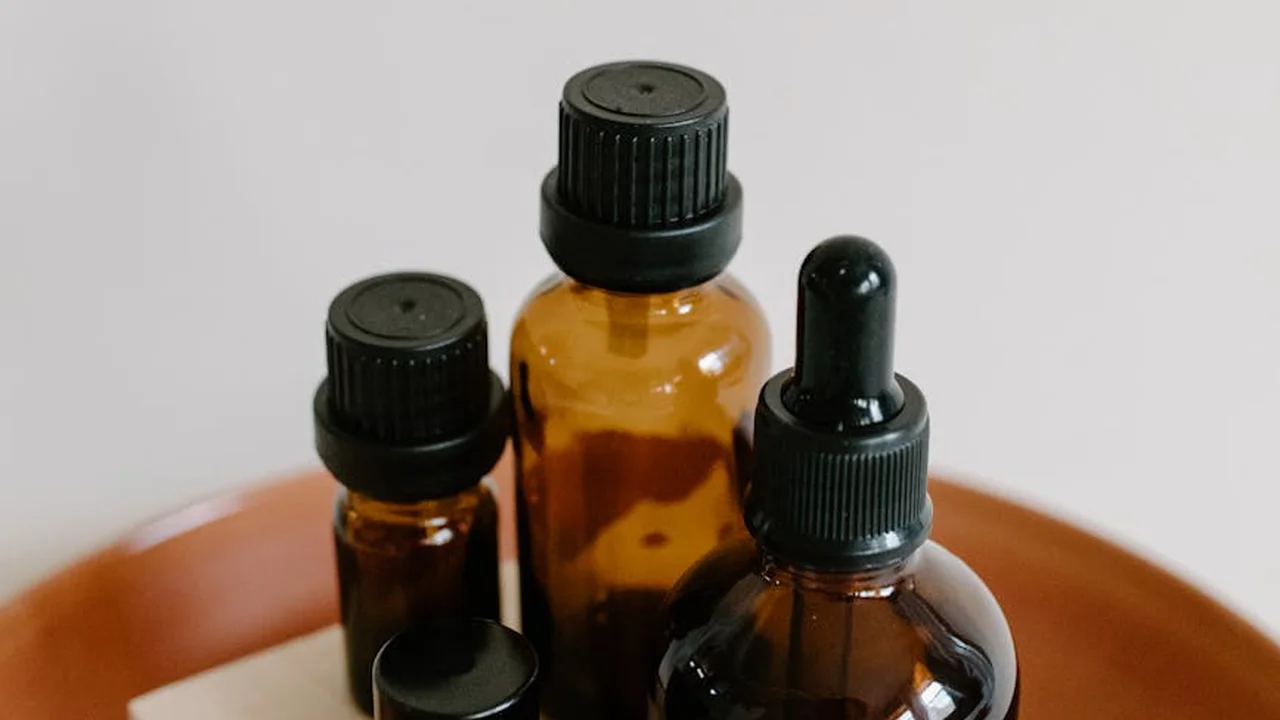
- Dark glass bottles (amber or cobalt blue) for storing your finished oil. Light degrades oil, so these are non-negotiable for shelf life.
- A funnel makes pouring much easier.
- A clean chopstick or spoon for stirring.
Now, for the most important ingredient: your carrier oil. This base oil determines your infusion’s texture, shelf life, and best use.
Your choice of carrier oil is the foundation of your infused oil’s character and longevity.
I keep a few different ones in my cabinet for specific projects:
- Jojoba Oil: My top recommendation for skin and hair infusions. It’s technically a liquid wax, so it has a remarkably long shelf life, absorbs beautifully, and feels silky, not greasy.
- Olive Oil: A classic, especially for culinary infusions (think garlic or rosemary). It has a distinct, rich scent and a heavier feel on the skin, which I love for a robust massage oil.
- Sweet Almond Oil: A wonderful, lightweight option for body and face oils. It’s slightly nutty, spreads easily, and is very kind to most skin types.
- Sunflower Oil: A fantastic, lightweight, and affordable neutral oil. It’s perfect for large batches or if you want the herb’s properties to shine without a strong base oil scent.
One safety rule I never bend: your plant material must be completely dry. Fresh herbs or flowers introduce water into the oil.
Water in oil creates a breeding ground for mold and bacteria, which can ruin your infusion and make it unsafe to use.
I always use herbs I’ve dried myself or sourced from a reputable supplier. For something like lavender, the buds should be crispy dry and easily fall off the stem. This simple step protects all your careful work.
The Two Main Home Methods: Slow Infusion and Gentle Heat
You have two excellent paths for pulling the goodness from plants into your oil. One is a lesson in patience. The other is a bit more hands-on.
The Slow and Steady Cold Infusion
This is the classic, set-it-and-forget-it method. It feels like a quiet collaboration with time. I use this for delicate flowers like lavender or chamomile.
You simply place your fully dried botanical material into a clean glass jar and cover it completely with your chosen carrier oil, like olive or avocado. Seal it tight.
Then, you find a cozy spot for it. A sunny windowsill works, but a warm, dark cupboard is my usual go-to. The gentle warmth helps the process along.
You will visit your jar every few days. Give it a gentle shake. Watch the oil slowly take on a richer color and the scent deepen.
This process needs a good 2 to 6 weeks to fully infuse, letting the oil absorb the plant’s compounds without any rush or heat.
When the oil smells and looks right to you, you strain it through a cheesecloth or fine mesh strainer into its final bottle. The result is a beautifully preserved, nutrient-rich oil.
The Faster, Low-Heat Methods
If weeks of waiting doesn’t fit your rhythm, gentle heat can speed things up. The key word is *gentle*. Too much heat damages the oil and the delicate properties of the herb.
I only use this method for heartier, resinous materials, like certain barks or spices.
You have two safe options here. A double boiler on your stovetop lets you control the heat precisely. The water in the bottom pot should be simmering, not boiling hard.
The other tool I keep in my apothecary is a small crockpot. You must use the “warm” setting, not “low” or “high,” as even “low” is often too hot and can scorch your oil.
Combine your dried herbs and oil in the crockpot or double boiler. The goal is to keep the oil warm to the touch, not hot. Think of a pleasant bath temperature.
Let it warm this way for 4 to 8 hours, checking in often. You will smell the infusion happening. Once done, let it cool completely before straining.
This method gives you a lovely infused oil in a single day, perfect for when you need a peppermint oil for a sore muscle blend or a rosemary infusion for your hair.
Your Simple Safety Checklist
Working with oils and heat is simple but deserves respect. Follow these three rules every single time.
- Always label your jar immediately with the date and contents. Trust me, in two weeks you will not remember which jar is lavender and which is calendula.
- Avoid all moisture by ensuring your herbs and jars are completely dry. Water introduces bacteria and can cause your precious infusion to mold and spoil.
- Never, ever leave heating oils unattended. If you’re using a crockpot or double boiler, stay nearby. Set a timer if you might get distracted.
Project 1: Making a Rich, Green Avocado Oil at Home
Commercial avocado oil is usually made by mashing the fruit’s flesh, then using powerful industrial presses and sometimes heat or chemical solvents to extract every last drop. It is efficient and creates a shelf stable, refined product.
Your kitchen version is a gentler, slower process. It is a labor of love that yields a small amount of intensely rich, green oil. The oil you make at home will be a fresh, unrefined treasure with a shorter shelf life, but it feels profoundly nourishing because you made it.
Your Step by Step Guide to Homemade Avocado Oil
This method uses the pulp and the thin inner skin, which hold valuable oils. You will need several very ripe avocados. I find that organic ones often have richer, greener flesh.
- Prepare the Fruit. Scoop the flesh from 4 5 large, very ripe avocados. Try to scrape off as much of the thin green skin from the inside of the peel as you can and add it to your bowl of flesh.
- Dry it Out. Spread the pulp and green skins in a very thin layer on a parchment lined baking sheet. Dry it in your oven on the lowest possible setting (ideally around 115°F 135°F / 45°F 57°C) for 4 to 6 hours. You want it completely dried and leathery, not baked or browned. This step is crucial to remove moisture and prevent mold.
- Grind to a Paste. Once completely cool, break the dried pieces into a clean coffee grinder or food processor. Grind them into a coarse, crumbly paste.
- Roast Gently (Optional). For a slightly nuttier flavor, you can lightly toast this paste in a dry skillet over very low heat for 2 3 minutes, stirring constantly. I sometimes skip this for a more buttery, raw green oil.
- The Pressing. Place the paste into the center of a few layers of strong, undyed cheesecloth. Twist the cloth into a tight bundle. Now, press and squeeze with all your might over a clean glass bowl. You can use a citrus press to help. This takes real effort and patience.
- Separate the Oil. Let the pressed liquid sit for an hour. The thick, dark green oil will rise to the top. Carefully spoon or siphon it into a small, dark glass bottle.
Store your precious oil in the refrigerator and use it within one month for the best quality and potency. You will notice a fine sediment at the bottom that is normal for a truly unrefined oil.
Simple Ways to Use Your Homemade Oil
This oil is thick and luxurious. It absorbs into skin and hair with a wonderful richness, leaving a soft, not greasy, finish. Unlike dry body oils, which are lightweight and quick-absorbing.
As a Nourishing Hair Mask: Warm a tablespoon of your avocado oil slightly. Apply it from your mid lengths to the ends of damp hair. Wrap your hair in a warm towel and leave it for 30 minutes before shampooing as usual. It smoothes frizz and adds a beautiful shine.
As a Rich Body Moisturizer: After a shower, while your skin is still damp, massage a few drops of the oil directly into areas that feel extra dry, like elbows, knees, and heels. It sinks in beautifully and locks in moisture. This complements using shower oil for skin hydration.
On my own shelf, this oil is the one I reach for when my hands feel rough from gardening. A single drop rubbed between my palms feels like a deep, green hug.
Project 2: Crafting Olive and Herb Infused Oils for Kitchen and Bath
Let’s be honest, the idea of cold pressing oil from fresh olives in your kitchen is thrilling. I get it. I once helped a friend with their small harvest using a specialized fruit press. The process is messy, physical, and incredibly rewarding if you have the olives and the gear. For most of us, creating beautiful infused oils from a quality store-bought bottle is the perfect, practical entry point.
It skips the monumental task of extraction and goes straight to the creative, aromatic fun.
The Simple Joy of a Kitchen Infusion
Infusing olive oil for cooking is about capturing flavor and sunshine in a bottle. I always keep a jar of rosemary-infused oil on my shelf for roasting vegetables. The herb’s piney scent steeps into the oil, making everything taste a bit brighter. You can also try basil-infused olive oil for cooking, dressings, and marinades to add a different twist to your dishes.
Start with a fresh, dry herb like rosemary, thyme, or a few cloves of peeled garlic. Moisture is the enemy here, as it can lead to spoilage.
Always use dried herbs or completely dry fresh ones to keep your infusion safe for the pantry.
- Gently warm a cup of extra virgin olive oil in a small saucepan. You want it warm to the touch, not hot. If it sizzles, it’s too hot.
- Add a handful of your chosen dry botanicals. For garlic, I use two or three sliced cloves.
- Let this mixture steep off the heat for several hours until the oil cools completely. This slow infusion pulls the flavor out gently.
- Strain the oil through a fine mesh sieve or cheesecloth into a very clean, dry glass bottle.
Use this oil within a month for the best flavor and store it in a cool, dark place. Drizzle it over bread, soups, or finished dishes.
Crafting a Skin-Safe Herbal Infusion
For your skin, you need a different approach. We must avoid any water content to prevent bacterial growth. This means we always start with bone-dry plant material. I prefer using dried lavender buds or calendula petals from my garden.
This method uses time, not heat, to create a stable, skin-loving oil you can use in salves or as a gentle body oil. The result is a subtle, herbaceous fragrance that feels like a hug.
- Fully crumble your dried herbs to expose more surface area. I fill a clean, dry mason jar about halfway.
- Pour a light, skin-friendly oil like fractionated coconut or sweet almond oil over the herbs until they are completely submerged. Leave an inch of space at the top.
- Seal the jar tightly and give it a gentle shake. Label it with the date.
- Place the jar in a warm, sunny spot, like a windowsill, for 4-6 weeks. Shake it every few days when you think of it.
- After the weeks have passed, strain the oil through a cheesecloth into a fresh bottle. Squeeze the cloth to get every precious drop.
This infused oil is now a versatile base. You can add a few drops to your bath, mix it with a little beeswax for a balm, or use it alone for a soothing massage after a long day.
Project 3: Calming Lavender and Cooling Peppermint Infusions
These two infusions are staples on my shelf. They capture the gentle spirit of the plants in a way that feels safe and simple to use around the home and on your body.
Crafting a Soothing Lavender Infused Oil
Lavender infused oil smells like a peaceful garden. I use it in homemade bath salts and linen sprays because its aroma is softly calming without being overpowering.
You will need dried lavender buds and a carrier oil like jojoba or sweet almond.
- Fill a clean, dry glass jar halfway with the dried lavender buds.
- Pour your chosen carrier oil over the herbs, leaving about an inch of space at the top.
- Seal the jar tightly and give it a gentle shake.
- Place the jar in a warm, dark spot like a pantry for 4 to 6 weeks, shaking it every few days.
- Strain the oil through a cheesecloth or fine mesh strainer into a clean bottle, squeezing every last drop from the herbs.
The result is a beautifully fragrant oil that brings a touch of serenity to your daily routines.
Making a Revitalizing Peppermint Infused Oil
Peppermint infused oil offers a mild, gentle cooling sensation. It is wonderful for massaging tired feet or soothing tight shoulders after a long day. If you’re wondering what the best carrier oils for massage therapy are, the right carrier can help tailor dilution and maximize comfort.
The process is identical to lavender, but start with dried peppermint leaves. I prefer using fractionated coconut oil here, as it stays liquid and feels light on the skin.
When you open the jar during the infusion period, the minty aroma is incredibly refreshing. This oil provides a pleasant cooling effect that is much softer than pure peppermint essential oil, making it a great introductory option.
A Crucial Note on Safety and Use
It is vital to remember these are herbal infusions, not essential oils. They are far less concentrated.
An infused oil will never match the potency of a true essential oil, and that is perfectly fine for most home and body projects. You are making a gentle, versatile botanical product.
For skin application, you can often use these infusions “neat” (undiluted) because they are already in a carrier oil. Always do a patch test first on a small area of your inner arm.
- Only use thoroughly dried plant material to prevent mold.
- Label your bottle with the date and contents.
- Store your finished oils in a cool, dark cabinet to extend their shelf life.
Keeping Your Creations Safe and Making Them Last
Your homemade oil is a fresh, living thing, not a shelf-stable product from a factory.
With good care, it will reward you for months.
Understanding Shelf Life and Spoilage
Most homemade infused oils last 3 to 6 months. Carrier oils like avocado or olive might last up to a year if they were very fresh when you started. However, unlike many cooking oils, infused oils tend to have a shorter shelf life due to the added ingredients.
The single biggest rule is to trust your senses. Your nose and eyes will tell you when an oil is past its prime.
Watch for a sharp, sour, or crayon-like smell. The oil may look cloudy or thicker than usual. If you see any mold-discard it immediately.
Think of it like cooking oil. If it smells off, it is off.
The Art of Proper Storage
Sunlight, heat, and water are the enemies of your botanical oils. Your storage habits make all the difference.
I always use dark amber or cobalt glass bottles. They block light that breaks down the oil.
Find a cool, dark spot. My oils live in a kitchen cabinet away from the stove and oven. A pantry or a closet shelf works perfectly.
Every time you use your oil, make sure your hands and any utensils are completely dry. Introducing even a drop of water can create a breeding ground for bacteria.
Keep the bottle’s cap tightly closed. If you used a fresh herb like mint, you might even store it in the refrigerator to be extra safe, though this can cause some cloudiness.
Putting Your Beautiful Oils to Work
Now for the truly rewarding part-using what you made.
That gentle lavender oil you infused? It makes a wonderful linen spray. I combine it with distilled water and a touch of vodka in a spray bottle for my bedding.
Your peppermint oil is a brilliant base for a cooling foot and leg rub, especially after a long day. Just remember to dilute it heavily in a plain lotion or carrier oil first, as homemade versions can still be potent.
And that rich, green avocado oil? Don’t just cook with it. I warm a tiny drop between my fingers and massage it into my cuticles and nails once a week. It’s deeply nourishing.
The goal is to enjoy the process and the product, safely and creatively.
Your Questions, Plant-Powered Answers
What basic equipment do I absolutely need to get started?
You truly only need a clean glass jar, a tight lid, and a strainer. Investing in dark glass bottles for storage is the key step for preserving your oil’s potency and shelf life.
What safety rule should I never break when making infused oils?
Never introduce water. Always ensure your plant material and all tools are completely dry to prevent mold and bacterial growth, which can make your oil unsafe.
How long will my homemade botanical oils last?
Most infused oils last 3 to 6 months when stored properly. Always trust your senses-discard the oil if it develops a sour smell, cloudiness, or any signs of mold.
Can I use dried lavender from my garden for an infusion?
Absolutely, using your own dried herbs is wonderful. Just ensure the buds are crispy dry to the touch before adding them to your oil to guarantee a safe, mold-free infusion.
What’s the real difference between my homemade infused oil and store-bought essential oil?
Your infused oil is a gentle, ready-to-use blend of plant compounds in a carrier oil, perfect for direct skin use. A true essential oil is highly concentrated and must be diluted; it requires distillation equipment not practical for home crafting.
Nurturing Your Botanical Craft
Your homemade oils will thrive when you prioritize cleanliness and patience. Starting with sterile jars and allowing infusions ample time to develop creates reliable products for skin, hair, and home.
Follow along with us at Botanical Oils to deepen your practice. With experience, you’ll learn to trust both the guidance here and your own growing expertise in herbal care.
Noemi Kamińska
Noemi is an accomplished wellness researcher, nutrition care guide and body care expert. She has years of experience in formulating various oil combinations for full body wellness including face, hair, body care, essential oils and cooking oils. She works as a bio-formulator working with oil chemistry and analyzing the best formulations when it comes to your needs. Feel free to reach out to get your oil needs sorted.