
How Do You Use an Essential Oil Diffuser? A Guide to Refilling, Water Ratios, Placement, Sizes, Dosage, and Dilution
That sleek new diffuser on your counter doesn’t need to be intimidating. I’ll help you turn it into a simple, reliable tool for wellness, just like the one humming softly on my own kitchen shelf.
Once you know a few fundamentals, using your diffuser becomes a quick and rewarding part of your daily routine.
- Refilling your diffuser correctly
- Understanding water to oil ratios
- Finding the best placement in your room
- Choosing the right diffuser size for your needs
- Determining proper essential oil dosage
- Learning about safe dilution practices
What is an Essential Oil Diffuser, Really?
Think of your diffuser as a personal scent artist for your room. It takes tiny drops of botanical oil and water, then transforms them into a fine, cool mist you can see and smell.
There’s often a gentle hum, a soft light, and that quiet plume of vapor. The aroma doesn’t hit you all at once. It unfolds gently, wrapping the room in a cozy blanket of scent.
Its main job is to disperse aroma into your air, which can shift your mood, freshen a space, or simply make your home feel more like your sanctuary. The one on my writing desk right now is my signal to start the workday, filled with a bright citrus blend.
Meeting the Diffuser Family: Which One is for You?
Not all diffusers work the same way. Picking the right one depends on the feeling you want in your space. Let’s meet the four main types.
Ultrasonic Diffusers
This is the most common type you’ll find for home use. An ultrasonic diffuser uses a small disc under water to vibrate at a super high frequency. This breaks the water and oil into a cool mist.
I recommend ultrasonic diffusers for most beginners because they’re affordable, quiet, and add a bit of humidity to dry air. They’re like a tiny, serene humidifier that also smells amazing.
Evaporative Diffusers
These use a fan or natural absorption to blow air through a pad or over reeds soaked in oil. The scent evaporates into the air. A simple reed diffuser is a classic example.
They’re low-tech and portable. You can absolutely refill a reed diffuser with essential oils, but you must mix them with a light carrier oil first; pure essential oils are too thick for the reeds to draw up properly. Most plug-in air fresheners use heat, not this method, so refilling those with oils isn’t safe or effective.
Heat Diffusers
These use a small heating element to warm the essential oil, causing it to evaporate faster. The scent can be strong, but the heat can also change the oil’s delicate chemical structure.
I tend to avoid heat diffusers for therapeutic use. They’re more like a modern, electric version of simmering herbs on the stove—great for a quick scent boost, but not for preserving the full benefits of the oil, especially when considering therapeutic benefits for allergies and sinus relief.
Nebulizing Diffusers
The powerhouse of the family. A nebulizer uses an air pump to blow a concentrated stream of *pure* essential oil into the air, with no water or heat involved.
The scent is intense and direct. This is my go-to for a quick, powerful aromatic session in my treatment space, but they use oil quickly and need regular cleaning. Think of it like a fine perfume atomizer for your entire room.
Quick Snapshot: Diffuser Types Compared
| Type | How It Works | Best For | Care Level |
|---|---|---|---|
| Ultrasonic | Vibrates water & oil into a cool mist. | Daily home use, adding humidity, gentle ambiance. | Easy (Regular water rinses). |
| Evaporative (Reed/Fan) | Fan blows air or reeds absorb oil for evaporation. | Portable scent, low-maintenance decor, small spaces. | Easy to Medium (Replace pads/reeds). |
| Heat | Warms oil to speed evaporation. | A quick, strong fragrance burst. | Easy. |
| Nebulizing | Air pump creates a fine mist of pure oil. | Potent, therapeutic sessions, large spaces. | Higher (Needs thorough cleaning). |
For most homes, an ultrasonic diffuser is the perfect starting point. It’s versatile, safe around kids and pets when used correctly, and that bit of extra moisture can feel lovely.
Your First Diffusion: A Step-by-Step Ritual
I want you to feel successful right from the start. The best way is to keep it wonderfully simple. I always tell beginners to pick one favorite oil and commit to a short session.
This simple focus lets you truly get to know how the oil and your diffuser work in your space. Before we begin, one non-negotiable rule: always place your diffuser on a flat, stable surface, well away from the edge of a table or counter. Water and electronics require respect.
- Find a home for your diffuser.
- Fill it with water.
- Add your chosen essential oil.
- Turn it on and adjust the settings.
- Clean it when the session is done.
Step 1: Find Its Home
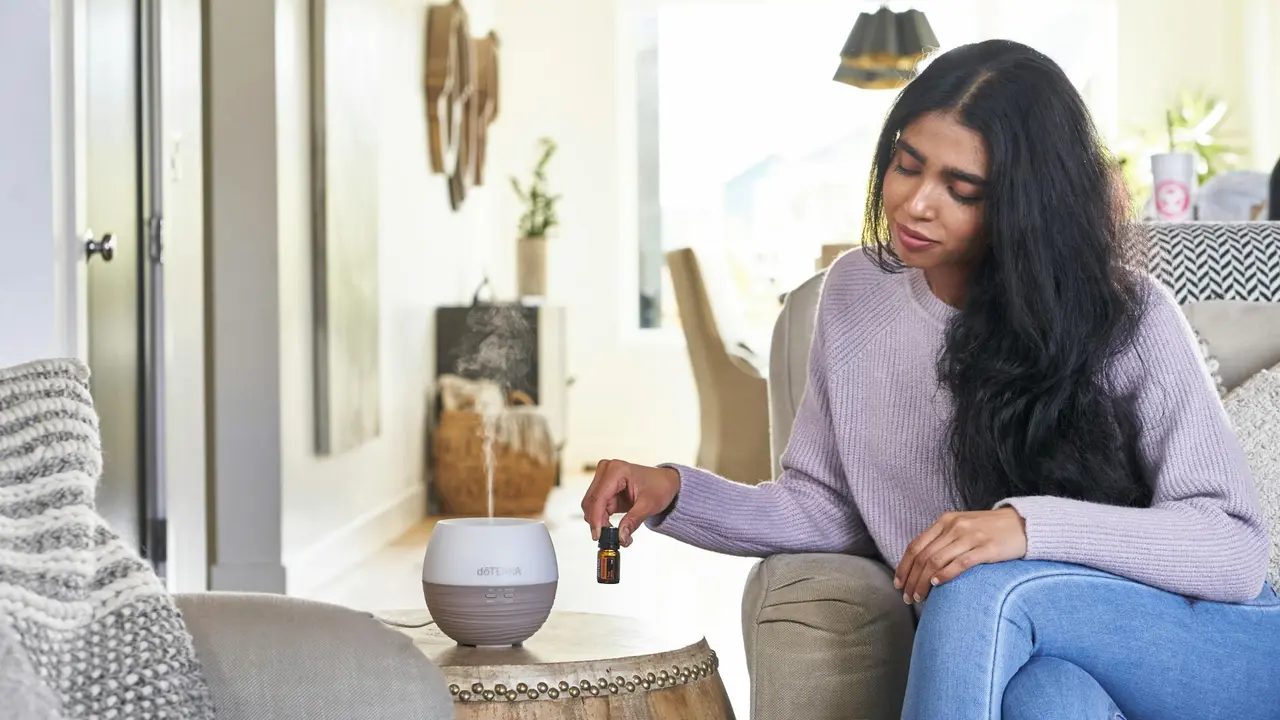
Think of your diffuser as a quiet friend who needs a little personal space. You want its mist to circulate freely. I place mine on a low wooden side table near the center of my living room.
A central spot in an open area allows the aromatic mist to spread gently and evenly throughout the room. Avoid tucking it right against a wall, under a shelf, or directly next to large electronics or heat sources.
Step 2: Add the Water
This is the foundation. If you have an ultrasonic diffuser (the most common, quiet kind that makes a cool mist), you absolutely do add water. The water is essential for creating that fine vapor.
I use room-temperature filtered water from my kitchen pitcher. Tap water works, but the minerals in hard water can leave a chalky white residue inside the tank over time. Using filtered or distilled water is a small habit that keeps your diffuser running smoothly for years. Fill to the maximum line indicated inside the reservoir. Never overfill.
Step 3: Add the Essential Oil
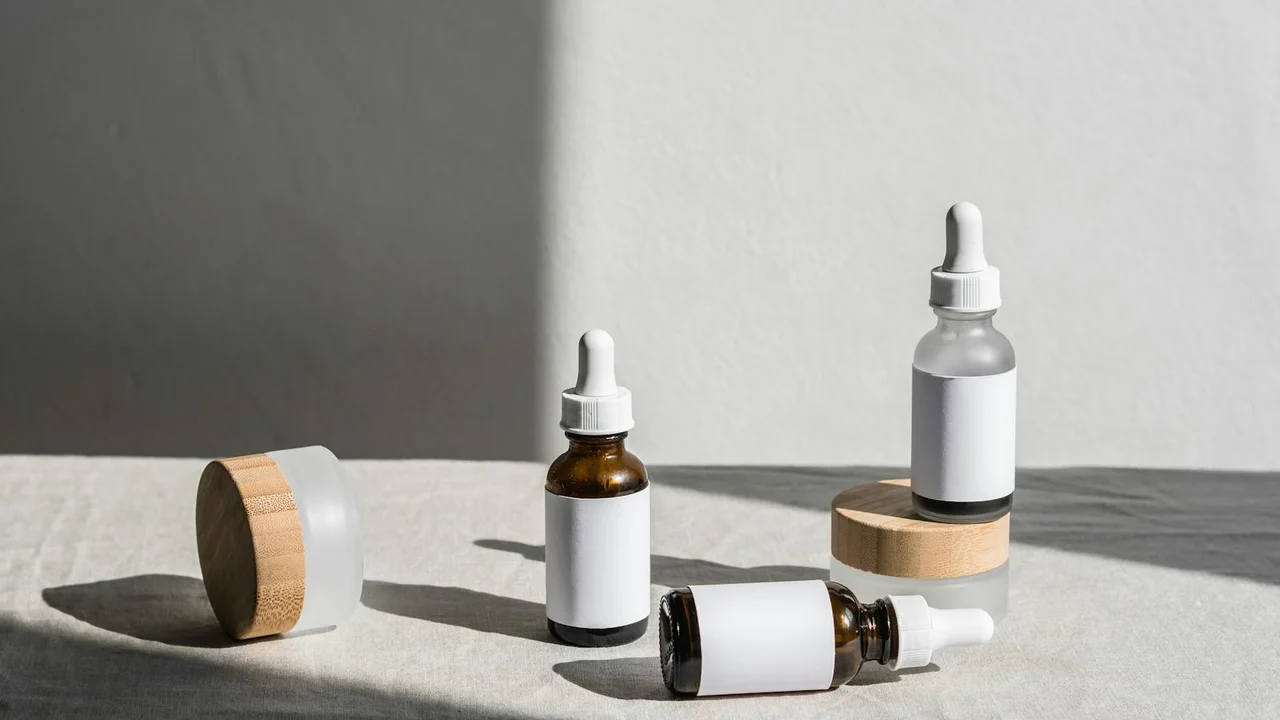
Now for the fun part. Open your chosen bottle. For a standard 100-200 ml diffuser, start with just 3 to 5 drops. You can always add more next time.
Let the drops fall directly into the water. You’ll see them bead up and float on the surface. The essential oil will naturally disperse with the ultrasonic vibrations, so there’s no need to stir or mix it. We will talk much more about dosage and blending later, but for a first try, one single oil is perfect.
Step 4: Start the Magic
Secure the lid on your diffuser. Plug it in. Press the power button. Many models have settings for continuous run or intermittent mist (like 30 seconds on, 30 seconds off).
I suggest starting with an intermittent setting for about 30 minutes for your first session. This lets you experience the scent as it builds without overwhelming your senses. You can leave the room and walk back in to get a true feel for its strength. It is much easier to add time than to clear a room that has become too fragrant.
Step 5: The Clean-Up
When your diffuser turns off or you decide the session is done, unplug it. Wait for the unit to cool down if it feels warm. The most important thing you can do for its longevity happens now.
Empty any leftover water. Use a soft, dry microfiber cloth to wipe the inside of the empty reservoir and the ultrasonic plate (that little metal disc at the bottom). A quick, gentle wipe after each use prevents oily buildup and keeps your next scent pure and clear. I keep a dedicated cloth in my apothecary drawer just for this. Let the parts air-dry before you put it away or use it again.
The Water and Oil Dance: Ratios and Dosage Made Simple
You have your diffuser and your favorite oils. Now what? The most common question I get is about the water to oil ratio. Knowing the correct ratio is essential when using essential oils in diffusers, as it ensures optimal scent distribution and safety for your diffuser reeds and diffuser sticks.
It feels like a secret formula, but it’s wonderfully straightforward.
Your Easy-to-Remember Rule
For most situations, this is my golden rule: use 3 to 5 drops of essential oil for every 100 milliliters of water in your diffuser’s tank. Understanding the correct essential oil-to-water ratios helps with safe dosing and ensures you achieve the intended aroma from your diffuser.
This 3-5 drops per 100ml ratio is a safe, effective starting point that works for a wide range of oils and room sizes.
Matching Drops to Your Diffuser’s Size
Diffuser tanks vary. A small bedside model might hold 100ml, while a large living room one could hold 500ml. Check your manual or the markings on the water tank.
Here’s how the math works out for common sizes:
- 100ml Tank: 3-5 drops total.
- 200ml Tank: 6-10 drops total.
- 300ml Tank: 9-15 drops total.
- 500ml Tank: 15-25 drops total.
I always start on the lower end. You can add a drop or two more next time if you want a stronger scent.
When to Adjust Your Dosage
Two big factors will change your perfect number: room size and oil potency.
For a small space, like a home office or bathroom, lean toward 3 drops per 100ml. A little goes a long way in close quarters. For a great room with high ceilings, you might use the full 5 drops per 100ml.
Oil strength matters just as much. Potent, camphoraceous oils like peppermint and eucalyptus can easily overwhelm a space.
I use half the amount I would for a gentle oil like lavender. For strong oils, I often recommend just 1-2 drops per 100ml, especially in bedrooms. I learned this after diffusing too much eucalyptus one evening and feeling like I was in a very intense cough drop. Not all essential oils are suitable for diffusing, so it’s important to choose wisely.
Can You Mix Diffuser Oil With Water?
This is a great question that gets to the heart of how most diffusers work. In an ultrasonic diffuser, you don’t need to mix the oil and water yourself.
You simply add the drops of essential oil directly into the water-filled tank. The diffuser’s ultrasonic plate vibrates at a high frequency, creating a fine mist that carries both water and oil molecules into the air together. Understanding which essential oils are safe for your diffuser—whether reed or ultrasonic—as well as brand-specific compatibility, can enhance your diffusing experience.
The vibration does the mixing for you, creating a consistent, well-diluted aromatic mist that’s safe to breathe. You’ll see the oils create a lovely, swirling pattern on the water’s surface before the mist starts.
Where to Place Your Diffuser for Magic in the Air
You picked a beautiful oil blend. Now, where do you put the diffuser so the aroma works its best? Think of it like placing a speaker for good sound.
The goal is to find a stable, central spot where the mist can circulate freely without damaging your things. I keep a small diffuser on my writing desk and a larger one in the living room, and their placements make all the difference.
Ideal Spots and Surfaces to Avoid
Look for a flat, level surface away from busy foot traffic. A side table, a sturdy shelf, or a clear desk corner are perfect.
- Keep it away from direct sunlight, which can degrade the plastic and the oils inside over time.
- Place it a few feet from large electronics like TVs or computers. The subtle heat and electromagnetic fields can sometimes interfere with the diffuser’s mechanics.
- Avoid putting it directly in the path of a draft from a vent, fan, or open window. A draft will push the mist into one corner instead of letting it gently fill the room.
Always use a protective coaster or small tray underneath, especially on wood surfaces. The mist is water-based and can leave a fine, oily ring on finished wood or delicate furniture. The coaster on my oak nightstand has saved me from many a watermark.
Room-by-Room Guidance
Your room’s purpose changes the placement strategy.
For Bedrooms and Home Offices
Elevation is key. Place your diffuser on a nightstand or dresser, slightly above floor level. This puts the mist right in your breathing zone as you relax or work.
Keep it at least an arm’s length from your bed or workspace to prevent direct moisture exposure while you sleep or type. I aim for the scent to be a soft background note, not an overwhelming cloud.
For Living Rooms and Open Spaces
Go for a central location. A coffee table, media console, or sideboard in the middle of the room helps the scent disperse evenly.
In larger rooms, you might not get a strong scent in every corner, and that’s okay. Placement affects the “scent throw”-a central spot gives you the widest, most balanced distribution.
Why Placement Really Matters
Where you set your diffuser isn’t just about furniture safety. It directly shapes your experience.
A poorly placed diffuser near a draft feels wasteful. The lovely scent of my lavender and cedarwood blend just vanishes. A well-placed one creates a consistent, gentle atmosphere.
Remember, you’re dispersing a fine water vapor, so placement also influences how that humidity spreads. A corner placement might make one area feel more humid, while a central spot distributes moisture more evenly. This simple choice makes your oil blend work harder and smarter for you.
Sizing Your Diffuser: From Cozy Nooks to Open Spaces
Choosing your diffuser size is about matching its capacity to your space and your plans for it.
A diffuser that’s too small for a large room will feel invisible, while a giant one in a tiny office can be overwhelming.
What Are the Different Sizes?
Think of diffusers in three main categories, based on their water tank capacity.
- Small (around 100ml): This is my go-to for the nightstand. It’s compact, perfect for a personal scent cloud right by your bed or desk.
- Medium (200-300ml): This is the most versatile size. It comfortably handles most bedrooms, living rooms, and home offices.
- Large (500ml and up): These are for open floor plans, large living areas, or if you want the aroma to run for many hours without a refill.
How Size Changes Everything
The water tank size directly controls two things: how long it runs and how far the scent travels.
A larger water tank means a longer run time before it needs a refill. My small 100ml diffuser might run for 3 hours, while my 300ml model in the living room can go for 8.
Coverage is about how well the mist disperses. A small diffuser gently scents the air immediately around it. A large one, with a more powerful motor, pushes that scented mist further into the room.
Picking the Perfect Size for You
Ask yourself two questions. How big is the room? How long do I want it to run?
For a quick refresh in a home office or a gentle night of sleep support, a small diffuser is brilliant. You don’t need a powerhouse for that.
For most shared spaces like living rooms or master bedrooms, a medium diffuser strikes the right balance of coverage and runtime. It fills the air without dominating it.
Choose a large diffuser for great rooms, combined kitchen and living spaces, or if you simply hate refilling it. I use one in my open-plan studio when I’m working all day and want a consistent, ambient aroma. If you’re wondering how to choose the best essential oil diffuser for your home, start by matching size to room and considering how you’ll use it most.
Dilution and Safety: Navigating Oils with Care
Let’s tackle the big question first. Do you need to dilute oils before putting them in a diffuser? For ultrasonic and nebulizing diffusers, you typically do not dilute the oils; you add them directly to the water tank. The machine creates that light, visible mist that carries the aroma.
Heat diffusers are different. Some models, like personal jewelry diffusers, have pads that touch your skin. For those, I always dilute. A single drop of a pure oil mixed into a teaspoon of jojoba oil from my shelf works perfectly.
This brings me to a key point. Pre-mixed “diffuser blends” are already diluted and ready to use, while pure botanical oils go straight into your diffuser’s water. I keep both types in my apothecary for different needs.
Working with these potent plant extracts means putting safety first. My home rules are simple and non-negotiable.
- Keep your diffuser out of your pet’s immediate breathing space. Birds, cats, and dogs can be very sensitive to airborne scents.
- If you have young children, are pregnant, or nursing, please consult a certified aromatherapist before diffusing. They can guide you on gentle, appropriate oils.
- Always diffuse in a room with good airflow. I run mine for 30 to 60 minutes at a time for a soft, lasting scent.
People often ask me, can I mix water with essential oils for reed diffuser? Reed diffusers use a carrier oil base, not water, to slowly wick the fragrance up the reeds. If you add water, the mixture will separate and the reeds won’t work. I make my own with fractionated coconut oil and a few drops of sandalwood.
Your Diffuser Care Checklist: Refill, Clean, Repeat
Think of your diffuser like a favorite mug. You wouldn’t keep adding new tea to yesterday’s old leaves. A clean diffuser works better, lasts longer, and keeps your oils smelling true.
Here is my simple routine to keep mist flowing and scents pure.
How to Refill Your Essential Oil Diffuser: The Simple Rhythm
You might wonder, “How do you refill an essential oil diffuser?” It’s a quick habit. I do this every time I want to change a scent or after a session.
- Unplug the device and carefully lift the top off.
- Pour any old water out into the sink. Tip it over a towel to catch drips.
- Use a soft cloth or paper towel to wipe the inside reservoir completely dry. This prevents water and old oil from mixing with your new blend.
- Fill to the max line with cool, fresh tap water. I avoid using hard water from my well; it can leave mineral buildup.
- Add your essential oils. For a standard 100-200ml diffuser, I start with 3-5 drops total. You can add more later if you want a stronger scent.
- Replace the lid, plug it in, and enjoy.
This quick wipe-down between uses prevents oily film from building up and makes deep cleaning much easier.
The Daily & Weekly Quick-Check List
Stick this list on your fridge or set a phone reminder. Consistency is simple.
- Every Refill: Empty old water, wipe dry, use fresh water.
- Weekly (or if scent seems weak): Give it a vinegar rinse (see below).
- Monthly: Check the ultrasonic plate (the little metal disc in the base) for white crusty buildup. A gentle wipe with a cotton swab dipped in vinegar helps.
- Always: Use on a stable, level surface away from direct sun and electronics.
- Never: Let it run dry while plugged in. I keep a sticky note on mine that says “WATER FIRST!” as a reminder.
The Deep Clean: Resetting with Vinegar
Even with wiping, a thin residue of essential oils can stick to the plastic. You’ll see it as a cloudy film. Vinegar cuts through it beautifully.
Every week or two, I give all the diffusers on my shelf this treatment.
- Unplug the diffuser and empty it.
- Fill the reservoir halfway with white distilled vinegar. Use a clean cloth to swish it around, coating all the interior surfaces. Let it sit for 5-10 minutes.
- Use a soft-bristled brush (an old toothbrush is perfect) to gently scrub the ultrasonic plate and any corners.
- Dump the vinegar, then rinse the tank 2-3 times with clean water until the vinegar smell is gone.
- Dry thoroughly with a towel before the next use.
A monthly vinegar soak dissolves stubborn oil residues that can clog the diffuser and muddle your next aromatic blend. It keeps everything fresh.
A Note on Brand-Specific Devices: Like Pura
Some readers ask, “can you refill pura diffuser?” Devices like Pura are designed for convenience with pre-mixed, proprietary scent cartridges.
You typically cannot refill those cartridges yourself with bulk oils. You must use the brand’s own refills. For any specialty device, your first step should always be to consult the manufacturer’s guide-it protects your warranty and ensures safety.
The core principles still apply: keep it clean, place it wisely, and use it as directed. The ritual of care, whether for a simple ultrasonic model or a smart device, is what makes your practice sustainable.
When to Seek Professional Help: Listen to Your Senses
Your diffuser should feel like a gentle helper, not a source of discomfort. Your body often gives the first and best signals.
If you or anyone in your home starts feeling a headache, slight nausea, or any tickle or tightness in the throat or chest, it’s your cue to act. Turn the diffuser off right away. Open a window for fresh air. These are clear signs to pause and reassess your blend or the duration of use.
Sometimes, a scent just doesn’t agree with you, and that’s perfectly normal. I have a beautiful bottle of rosemary cineole on my shelf that I adore for focus, but it can make my partner feel on edge. We listen to that.
Getting Personalized Guidance
For general ambiance, following basic guidelines works well. But for specific wellness goals-like creating a blend to support winding down in a hectic household or finding oils that feel uplifting during gray weather-a certified aromatherapist is a wonderful resource.
They can look at your entire picture and craft recommendations just for you. Consulting a professional helps you navigate your unique needs safely and effectively. It’s an investment in using these botanical tools with greater confidence.
The Purpose of Your Diffuser
This is a point I return to often in my own practice. An essential oil diffuser is designed to disperse aroma into a space to create an atmosphere. It can make a room feel calm, clean, or invigorating.
A diffuser is for ambient aroma and mood support; it is not a device for treating medical conditions. Think of it like lighting a beautifully scented candle for the feeling it provides, not for a specific physiological outcome.
When in Doubt, Pause
You might read about an oil and feel unsure if it’s right for your family, maybe because of a pet, a young child, or a pre-existing health condition. That feeling of uncertainty is valuable.
When that happens, the safest step is to not use that oil in your diffuser until you get clear advice from a reliable source, like your doctor or a certified aromatherapist. Stopping use and asking questions is a sign of smart, respectful practice. It’s how we learn and use these oils in a way that truly cares for our homes.
Quick Answers from a Plant Friend
What type of water should I really use in my diffuser?
For clean mist and a long diffuser life, use filtered or distilled water. Tap water, especially if hard, can leave mineral deposits on the ultrasonic plate over time.
How often should I refill my diffuser’s water tank?
Refill with fresh water at the start of every new diffusion session, even if some water remains. This prevents stagnant water and keeps your next scent pure and vibrant.
Where should I *not* place my diffuser around pets or children?
Avoid placing it in enclosed spaces with them, like a small bedroom they’re occupying, or directly in their breathing zone. Always ensure the room has good airflow during use.
I love potent oils like peppermint. How do I adjust the dosage?
For strong, camphoraceous oils, start with just 1-2 drops per 100ml of water-that’s half the usual starting point. You can always add more next time, but it’s hard to take scent out of the air, even after cleaning your diffuser.
Do I need to dilute oils for a reed diffuser?
Yes, absolutely. Pure essential oils are too thick for reeds to draw up; you must dilute them in a light carrier oil like fractionated coconut or sweet almond oil for proper function.
Caring for Your Scented Sanctuary
The single most important practice is to always dilute your essential oils in plenty of fresh water. This respectful approach safeguards your wellbeing and allows the true character of each botanical to fill your home.
I hope my guidance from the apothecary shelf helps you experiment with confidence. Trust your own senses as you craft blends for body, skin, hair, and home-they will guide you beautifully.
Expert Resources and Citations
- Essential Oil Diffuser Guide: Aroma Magic & Wellness – The Mockingbird Apothecary & General Store
- Guide to Essential Oil Diffusers | AromaWeb
- Essential Oil Diffuser Guide | Young Living Essential Oils
- The Top Essential Oils for Diffusers: A Comprehensive Guide
- Essential Oils Use Chart | Amrita Aromatherapy
Noemi Kamińska
Noemi is an accomplished wellness researcher, nutrition care guide and body care expert. She has years of experience in formulating various oil combinations for full body wellness including face, hair, body care, essential oils and cooking oils. She works as a bio-formulator working with oil chemistry and analyzing the best formulations when it comes to your needs. Feel free to reach out to get your oil needs sorted.