
How Do I Fix, Clean, and Maintain My Essential Oil Diffuser for Maximum Scent?
When your diffuser’s output turns faint or uneven, it can dampen the cozy atmosphere you’re trying to create. From my shelf of well-loved diffusers, I’ve learned that a weak scent usually signals a simple fix, not a broken machine.
This guide will walk you through the straightforward care that keeps your diffuser releasing a robust, clear scent every time.
- How to troubleshoot and fix common diffuser problems
- My preferred method for a deep, safe clean
- Easy daily habits to prevent future buildup
Key Takeaways: Your Diffuser Care Cheat Sheet
Think of your diffuser like a good kitchen knife. A little regular care keeps it sharp and effective for years.
- If you can’t smell your oils anymore, a deep clean is almost always the fix. Oil residue and water minerals build up a film that traps scent.
- Swap tap water for distilled or filtered water. This one change prevents the white, chalky buildup that muffles fragrance.
- Empty the water tank after every use. Letting water and oil sit creates a sticky film and can lead to musty smells.
- Wipe the unit with a soft, damp cloth weekly. This simple habit keeps the exterior clean and prevents dust from getting inside.
- Always follow your model’s specific instructions. Some parts, like a nebulizer’s glass chamber, need gentler handling than a plastic ultrasonic tank.
What Kind of Diffuser Do You Have? A Simple Breakdown
Cleaning isn’t one-size-fits-all. How you care for it depends entirely on how it works. Let’s match your machine to its maintenance plan.
There are four main types. Ultrasonic diffusers are the quiet mist-makers you see most often. Heat diffusers use gentle warmth. Evaporative types, like reed diffusers or ones with a fan, let scent drift into the air. Nebulizing diffusers are the powerful purists that use no water at all.
Your cleaning routine hinges on whether your diffuser uses water, heat, or just air. Water-based models fight mineral scale. Oil-only models fight viscous clogs.
Ultrasonic Diffusers: The Popular Mist-Makers
This is probably the one on your nightstand. It uses a small, vibrating plate under water to create that cool, quiet mist. I have two of these in regular rotation on my shelf.
Because they mix water and oils, they need consistent attention. That vibrating plate is the heart of the machine, and keeping it free of film is your top job. They usually shut off automatically when dry, which is safe but can leave residue behind.
They require the most frequent water changes. I never let water sit in mine for more than a day. Stagnant water leads to a filmy tank and a weak, muddy scent.
Heat and Evaporative Diffusers: The Simple Spreaders
These are straightforward but need their own kind of watchfulness.
Heat diffusers use a warming element, like a tiny hot plate or a light bulb. They often lack auto-shutoff features. You must watch the water level to prevent it from running completely dry, which can damage the unit or become a fire risk. The heat can also bake oil residue onto the dish, making it harder to clean if you wait.
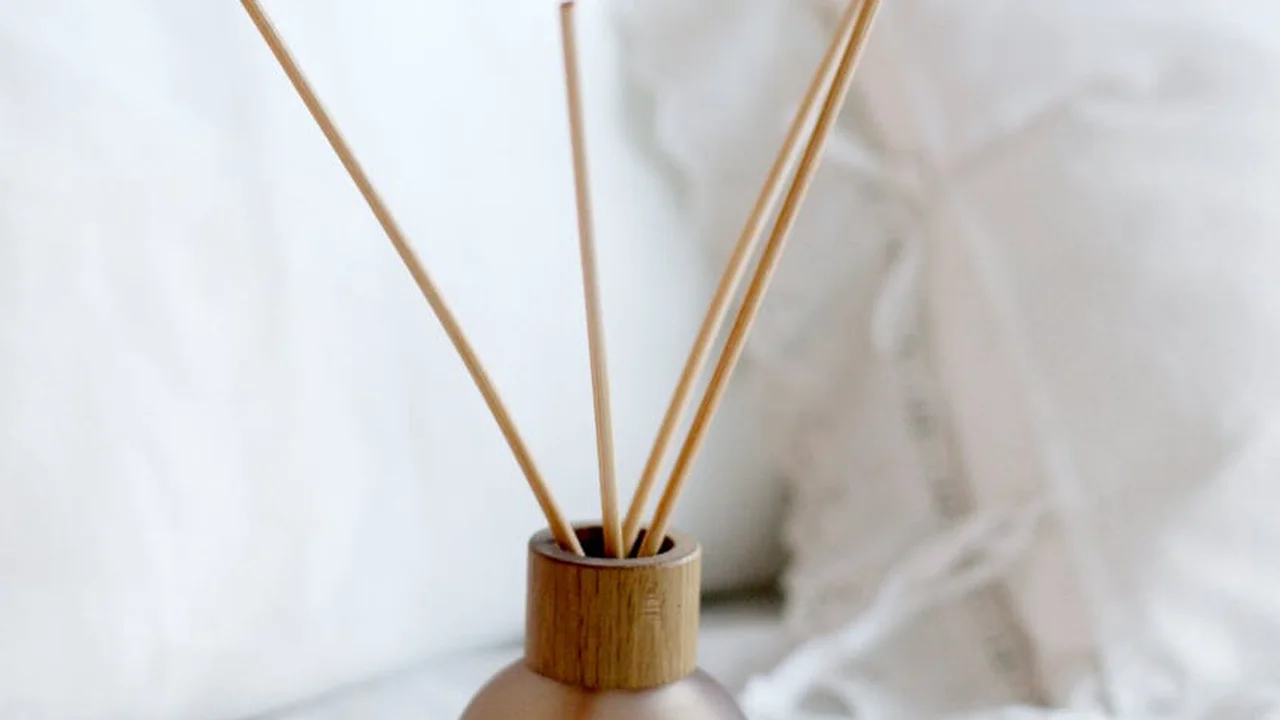
Evaporative diffusers, including reed diffusers and some plug-in fan models, are passive. The reed type just needs its sticks flipped and the oil solution refreshed every few months. Fan models use a pad or filter that absorbs oil. That pad needs to be replaced or cleaned regularly, or it becomes saturated and stops releasing scent effectively.
Nebulizing Diffusers: The Powerful Purists
These are the workhorses of strong aroma. They use a pump and a glass chamber to blast oil into a fine mist without any water. The scent is potent and undiluted.
They require a different care mindset. Since they use pure oil, thick resins like frankincense or myrrh can harden and clog the tiny jet inside the glass chamber. This is the most common reason they stop working.
They need careful cleaning after each use. I never leave oil in my nebulizer. After a session, I run a little high-proof rubbing alcohol through it to break down any remaining oil and keep the pathway clear. It’s a bit more hands-on, but it keeps that powerful scent flowing.
How Often Should You Clean Your Essential Oil Diffuser?
Your cleaning schedule really depends on the type of diffuser you own. I have both kinds on my apothecary shelf, and I treat them differently.
For common water-based ultrasonic diffusers, a simple rule works well. Give it a quick clean after every one or two uses to prevent oily film from building up inside the tank. Especially if you’re using essential oils in your diffuser.
My nebulizing diffuser, which uses no water, gets attention after every single session. Pure oils can leave a thick residue that clogs the fine mechanism, which is why water alone isn’t effective for diluting essential oils.
Putting off this basic care leads to obvious problems. The scents become weak and muddled because old oil residues mix with your new blends.
You might even notice a faint, musty smell instead of the crisp aroma you expected. If your diffuser’s output smells off or seems weak, infrequent cleaning is the first thing I check.
Beyond the daily wipe, I schedule a “deep clean” day once a month. I use this time to freshen up all my devices at once.
This thorough process clears out any hidden gunk from the ultrasonic plate or tiny air vents you can’t reach during a quick rinse. A monthly deep clean keeps your diffuser performing like new and protects your investment in quality oils.
The Step-by-Step Guide to Cleaning Any Diffuser
Let’s get right to the heart of your question: how do I clean my oil diffuser properly? The process is simple when you break it down into safe, easy stages. Your number one rule, before you touch anything else, is to always unplug the device and let it cool down completely. I’ve seen too many folks rush this step and risk damaging their favorite unit.
Your Basic Weekly Clean: Quick and Effective
Think of this like brushing your teeth. A quick weekly tidy keeps everything running smoothly and your scents pure. I do this every Sunday while my morning tea steeps.
Here is my simple routine.
- Unplug the diffuser and pour out any old water. I always do this over a houseplant-they seem to like the trace oils.
- Take a soft, lint-free cloth (an old cotton t-shirt scrap is perfect) and dampen a corner with plain white vinegar or rubbing alcohol. Wipe the entire interior water tank to cut through any light oil film.
- Now for the most important part. Dip a cotton swab in your vinegar or alcohol and gently wipe the small, shiny ultrasonic plate or heating element at the bottom of the tank. This is where scent magic happens, and keeping it clean is non-negotiable.
- Let everything air-dry completely, upside down on a clean towel. No hairdryers, no wiping with a dry cloth. Just let time and air do the work.
That’s it. This five-minute habit prevents most problems before they start.
Tackling Sticky Residue and Funky Smells
Sometimes, a diffuser needs a deeper reset. Maybe you forgot a blend for a few days, and now there’s a sticky ring or a weird, musty odor. Don’t worry. This is common and totally fixable.
For oily, sticky residue, I use a gentle soak. Fill the tank with warm (not hot) water and add just one drop of mild dish soap. Let it sit for ten minutes, swish it around, and rinse thoroughly. The soap cuts the grease without harshness.
If a funky, mildewy smell is the issue, vinegar is your best friend. A soak with equal parts white vinegar and warm water for 15-20 minutes will neutralize those musty odors naturally. I keep a bottle just for cleaning in my apothecary.
After any soak, rinse the tank several times with clean water until you can’t smell soap or vinegar at all. Remember, patience is key. Never use abrasive scrubbers, bleach, or strong chemical cleaners, as they will damage the delicate diffuser mechanism and leave behind fumes. Your nose and your machine will thank you for the gentle approach.
Why Can’t I Smell My Oils? Troubleshooting Scent Problems
It happens to all of us. You add your favorite oils, hit start, and… nothing. Or maybe the scent just fades away too fast.
This is a common worry, but there’s usually a simple reason. Let’s find yours. The four most common culprits are a tired nose, a clogged machine, weak oils, or a big space. We’ll tackle each one.
- Nose Blindness (Olfactory Fatigue): Your nose is amazing, but it can get lazy. It stops sending signals about a constant scent.
- A Dirty Diffuser: Mineral deposits and old oil residue can block the misting mechanism or muddle new scents.
- Poor Oil Quality or Age: Oils that are old, diluted, or not pure won’t have a vibrant aromatic profile.
- A Room That’s Too Large or Drafty: A small diffuser in a great room is like a single candle in a gym. The scent gets lost.
Resetting Your Nose and Your Routine
Think of olfactory fatigue like listening to one song on repeat. Soon, you stop really hearing it. Your nose does the same with a steady scent.
The fix is to surprise your senses and give them a break. I use a simple rotation on the shelf by my kitchen diffuser.
- Diffuse in shorter bursts. Try 30 minutes on, 30 minutes off instead of running it all day.
- Switch your oil blend every week. Go from citrus to woodsy to herbal.
- Step outside for a few minutes. Fresh air is the best reset button for your nose.
I keep a small bottle of peppermint oil handy. One quick sniff is a jolt that seems to wake everything up again.
Checking the Hardware and the Oil
First, look at your diffuser. Is it actually working? Turn it on with just water and hold your hand over it. You should feel a light, cool mist. If the mist is weak or absent, you likely have a cleaning or calibration issue.
Check the settings. Some diffusers have an intermittent mist option that runs for only 10 seconds every minute. Switch it to continuous mist for the strongest scent throw and to troubleshoot.
Now, check your oils. Pure essential oils are volatile, meaning they evaporate quickly into the air. If your oil smells flat or feels thick and slick, it might be old or cut with a carrier oil.
Never put carrier oils (like jojoba or sweet almond) in your diffuser’s water tank. They will coat the internal parts and can cause permanent damage. I learned this the hard way with a favorite ultrasonic model. It left a gummy film that was a pain to scrub clean. Even when using essential oils, only use a few drops to avoid buildup.
For the best scent, use fresh, pure essential oils from a trusted source and pair your diffuser size with your room size. Proper usage of your diffuser ensures optimal fragrance distribution.
Fixing Common Diffuser Glitches and Noises
Even the most reliable diffuser can have an off day. Before you worry it’s broken, try these simple fixes. A glitch is usually just your diffuser asking for a little attention.
When the Mist Stops or the Lights Flash
Your diffuser is quiet, the lights might be blinking, and there’s no cozy mist in sight. Don’t panic. Start with the basics.
First, check the water level. If it’s below the minimum line, the sensor can’t work. Top it up with cool, fresh water. Next, trace the power cord from the wall to the unit. Make sure every plug is snug.
Many models have an auto-shutoff that triggers when the water tank is empty or after a set time. This safety feature is a sign of good design, not a flaw. My bedside diffuser turns itself off every three hours, and I just press start again when I notice.
If those steps don’t help, try a reset. Unplug it for a full minute, then plug it back in and press the power button. It’s the digital equivalent of a deep breath.
Quieting a Noisy or Buzzing Diffuser
A loud buzzing or grinding noise can be jarring. It often comes from the heart of the device: the ultrasonic plate.
That persistent hum usually means mineral deposits from your water have built up on the plate. Hard water leaves a chalky film that interferes with the vibration. A gentle cleaning, like we discussed earlier, almost always solves a diffuser making a loud noise.
Turn it off, empty it, and use a cotton swab dipped in white vinegar to softly wipe the circular metal plate. Let it sit for a minute, then wipe with a water-dampened swab. You’ll often see the grit come right off.
If the noise continues after cleaning, the unit might be on an uneven surface. Place it on a flat, stable table. A wobbly base can cause vibrations that sound much worse than they are.
Daily Habits for Diffuser Longevity and Safety
Think of your diffuser like a trusted friend in your self-care routine. A little daily kindness goes a long way toward keeping it happy and working perfectly for years. Curious whether it actually works and what benefits it offers? We’ll cover that in the next steps.
My first tip is about placement. I keep my diffuser on a coaster or small tray, on a stable surface away from electronics and direct sunlight. This prevents any accidental water rings and protects the unit from heat.
For homes with curious pets or little ones, safety starts with where you put it. Choose a high, out-of-reach spot where it can’t be knocked over.
Always diffuse in a room with the door open or a window cracked. Good airflow prevents the aroma from becoming too concentrated and ensures a comfortable environment for everyone, including sensitive family members.
If you have pets, be mindful of your oil selections. I always research a new oil before using it around my cat. Oils like lavender, frankincense, and cedarwood are generally considered safer options when used moderately in a well-ventilated space, but it’s best to check with your vet.
Water Wisdom and Oil Choices
The water you use is the secret to a clean machine and a pure scent. I only use distilled or filtered water in my diffusers.
Tap water contains minerals that leave a chalky, white residue on the inner walls and ultrasonic plate. Over time, this gunk can muffle the diffusion and is a pain to scrub off.
Using distilled water prevents that mineral buildup entirely, so your diffuser stays cleaner with far less effort. I keep a dedicated jug under my sink just for this purpose.
Now, let’s talk oil. It’s tempting to add ten drops for a stronger smell, but that can backfire. Too much oil can overwhelm your senses and leave a sticky film inside the reservoir that clogs the mechanism. Make sure to use essential oils appropriately to avoid such issues.
For my standard-size diffuser, I rarely use more than 3-6 drops. That’s plenty to scent my living room gently. Starting with fewer drops gives you a lighter, more enjoyable aroma and protects your diffuser from getting gummed up. Understanding the correct oil-to-water ratios and dosage amounts for different diffusers helps you dial in the scent more precisely. This knowledge also makes it easier to adjust strengths across rooms and diffuser styles.
Giving Your Diffuser a Rest
Your diffuser needs to breathe, just like you do. Running it non-stop creates a constantly damp environment inside, which is an invitation for mold or mildew to grow.
I follow a simple rule: diffuse for one hour, then off for at least one hour. For overnight use, I use the built-in timer for 2-4 hours so it turns off on its own.
This drying-out period is crucial. It lets any internal moisture evaporate, keeping the unit fresh and hygienic between uses.
These regular breaks also reduce wear on the small motor and ultrasonic plate, extending the life of your device significantly. It’s a small habit that makes a big difference. I give mine a full day off every week to air out completely.
When to Seek Professional Help or Replace Your Diffuser
I love a good DIY fix. My own diffuser shelf has seen its share of vinegar soaks and gentle scrubs. My personal rule is simple: if the problem is with water, oil residue, or a simple clog, that’s my domain. The moment electricity, the internal motor, or the structural integrity of the unit is in question, my hands stay off.
Signs Your Diffuser Needs a Pro (or a Retirement)
Listen to what your diffuser is telling you. Some signals mean it’s time to stop troubleshooting and start seeking help.
- Persistent Electrical Problems: If it randomly turns off, refuses to power on even with a different outlet, or the light functions are erratic, the issue is likely internal. Water and circuitry are a dangerous mix for amateur repairs.
- Cracks or Clouding in the Water Tank: A fine hairline crack can be hard to spot. If the plastic is visibly clouded, warped, or has any breach, it will leak. This risks water damaging the motor and your furniture.
- A Motor That Smells Like Burning or Gets Very Hot: A faint, warm electronic smell can be normal. A sharp, acrid burning odor is not. If the base of the diffuser becomes uncomfortably hot to the touch, unplug it immediately and do not use it again.
Knowing When to Let Go
I have a little ceramic diffuser that lasted eight years. When its motor finally sighed its last breath, I thanked it and recycled it properly. Repairing a basic ultrasonic diffuser often costs more than purchasing a new one.
Beyond cost, consider safety. A compromised unit is a fire and water damage risk. Replacing a well-loved diffuser can feel sad, but it ensures your home remains a safe, beautifully scented sanctuary. You can then focus that care on choosing a new companion for your oils.
Your Diffuser Care Questions, Answered
Why is distilled water so much better than tap water?
Tap water contains minerals that leave a hard, white scale on your diffuser’s ultrasonic plate, which mutes scent and can cause noise. Using distilled or filtered water prevents this buildup entirely, ensuring a stronger aroma and less cleaning.
Are there any oils I should avoid putting in my diffuser?
Avoid thick, resinous oils like myrrh or frankincense in water-based ultrasonic diffusers, as they can gum up the mechanism. For any diffuser, never use carrier oils (like jojoba or coconut oil), as they will coat the interior and are very difficult to clean. If you’re unsure which essential oils are safe for your diffuser, our guide on reed vs ultrasonic and brand-specific compatibility can help you choose confidently. Once you know the safe options, you can match oils to your diffuser with peace of mind.
Can I clean my diffuser too often or with anything too strong?
You cannot clean it too often, but you can use cleaners that are too harsh. Always avoid abrasive scrubs, bleach, or strong chemical cleaners, as they can damage plastic and leave unsafe residues. Stick to gentle white vinegar, rubbing alcohol, or mild soap.
My diffuser is clean and running, but the mist is very weak. What’s wrong?
A weak mist often points to a clogged or dirty ultrasonic plate, even if the tank looks clean. Gently wipe the plate with a vinegar-dampened cotton swab, as a nearly invisible film can drastically reduce its vibrating efficiency and mist output.
What’s the one simple habit that makes the biggest difference for maintenance?
Emptying the water tank after every single use is the most impactful habit. Letting water and oil residue sit promotes sticky film and musty smells, while a dry start for your next session keeps scents pure and your diffuser fresh.
Final Thoughts on Your Diffuser’s Care
The single most important habit you can build is a simple, post-use rinse. This tiny act prevents the sticky, fragrant residue that dampens scent and shortens your diffuser’s life.
I trust you feel ready to care for your tool with confidence. For more guidance on blending oils for your home, hair, or skin, the rest of our blog is here for you. You’ll also find practical notes on proper essential oil dilution ratios and how to mix them with carrier oils for hair and skin. These insights will help you blend safely and effectively across your home care, hair, and skincare routines.
Further Reading & Sources
- Relax and Enjoy the Scent From a Well-Cleaned Essential Oil Diffuser
- The best-kept secrets for maintaining your diffuser
- Cleaning Your Diffuser | doTERRA Essential Oils
- r/essentialoils on Reddit: What is the best way to clean your diffuser and how often should you
Noemi Kamińska
Noemi is an accomplished wellness researcher, nutrition care guide and body care expert. She has years of experience in formulating various oil combinations for full body wellness including face, hair, body care, essential oils and cooking oils. She works as a bio-formulator working with oil chemistry and analyzing the best formulations when it comes to your needs. Feel free to reach out to get your oil needs sorted.