
How Can You Extract Coconut Oil at Home for DIY Body Care?
I understand if making your own coconut oil feels like a big project, but from my apothecary shelf to yours, I promise it’s within reach. This process gives you a truly pure oil that makes every DIY recipe feel more special.
Here, I’ll share my hands-on method for extracting oil and blending it into simple, effective body care.
- My step-by-step guide for cold-pressing oil from fresh coconut
- How to make a rich, moisturizing body butter for dry skin
- A calming sugar scrub recipe with lavender from my garden
- Key storage tips to keep your homemade oil fresh
The Heart of the Coconut: What Makes This Oil Special
Opening a jar of virgin coconut oil is a little moment of escape. You get that soft, tropical, nutty scent. It’s not overpowering, just a gentle reminder of sunshine. In its solid state, it feels firm and waxy in your hands.
But scoop a little onto your fingertips, and your body’s warmth makes it melt instantly into a silky liquid that drinks right into your skin.
That magic happens because of what’s inside. Coconut oil is packed with a special fat called lauric acid. Think of lauric acid as a cozy, medium-length blanket for your skin cells.
It’s long enough to provide deep nourishment and create a gentle, protective barrier, but not so long that it feels heavy or greasy for hours. That’s why it leaves your skin feeling fed and smoothed, not slick.
Now, if you see “fractionated” coconut oil on a shelf, know it’s a different product. I keep a bottle for making roll-on perfumes. Fractionated oil has been processed to stay liquid forever and has no scent.
For your DIY body care, virgin coconut oil is the winner-it’s the whole, unrefined treasure with all its moisturizing compounds and that lovely aroma intact. How does it compare to refined coconut oil for skin, hair, and cooking? Understanding the key differences and benefits helps you decide which to reach for.
Your Homemade Coconut Oil Toolkit: What You’ll Really Need
You don’t need a fancy lab. Your kitchen already holds almost everything required. Here’s my go-to list:
- A good blender or food processor
- A large bowl
- Fine cheesecloth or a nut milk bag (this is key for straining)
- A clean glass jar for storage
- A pot for gentle heating
- A spoon for skimming
Many folks searching for how do you get coconut oil from a coconut come across expensive “coconut oil extraction machines.”
Those are for commercial operations producing gallons daily. For your home apothecary, the hands-on method is simple, satisfying, and cost-free for equipment.
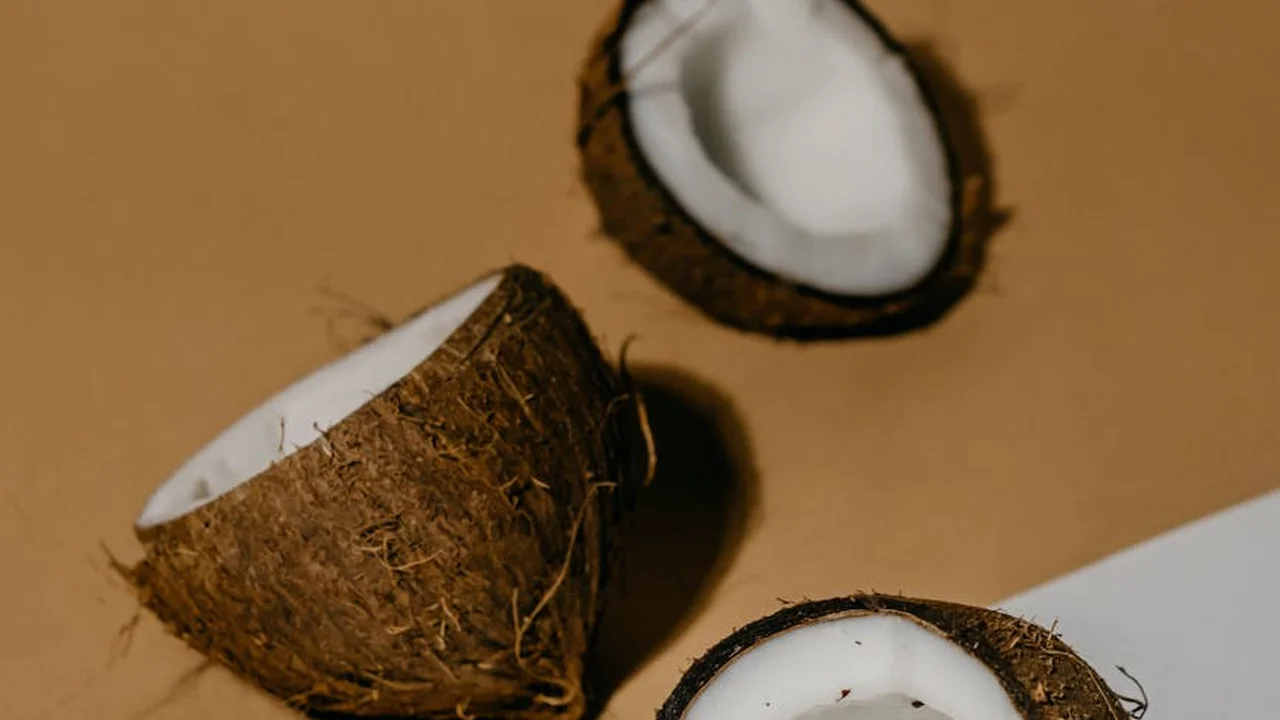
The coconut itself is your most important ingredient. You want a mature, brown coconut, not a young green one. The green ones are for water and soft jelly.
The mature brown nut has developed the thick, fatty meat that’s necessary for yielding oil. This is the standard starting point. While you can use dried coconut (copra), starting fresh gives you control and the purest, most vibrant result.
Starting with a fresh, mature coconut connects you directly to the source of the oil and lets you witness the entire beautiful, transformative process. You may wonder: do I melt or liquify solid coconut oil for cooking, or apply it to the skin? This question links kitchen use with body care, showing coconut oil’s versatility and gentle nature.
How Do I Extract Coconut Oil at Home? A Realistic Look at Methods
Before you start, it’s helpful to know how most store-bought oil is made.
Commercial producers often use expeller pressing, which squeezes dried coconut meat (copra) with massive heat and pressure. More refined brands use centrifuges to spin fresh coconut milk at high speed, separating the oil quickly.
Your home kitchen won’t have these tools, but you can achieve beautiful, pure oil with patience and simple equipment. The goal at home is to separate the natural oils from the coconut milk’s water and solids.
| Method | Key Process | Time | Final Oil Character |
|---|---|---|---|
| Cold Process | Natural separation by gravity | 24-48 hours | Raw, creamy, mild coconut scent |
| Fermentation | Natural bacterial separation | 24-48 hours | Pure oil, sometimes with a slight fermented note |
| Heat / Slow Cooker | Evaporating water with low heat | 2-4 hours | Clear, toasted coconut aroma |
The Gentle Cold Process (My Favorite for Purity)
This is the classic answer for how you can make coconut oil at home without any heat. I love it for body care because it feels the most pristine.
The oil you get has a soft, almost buttery texture and a very light scent.
- Grate the meat from 2-3 mature, brown coconuts. You want about 4 cups of loosely packed flakes.
- Add warm (not hot) water to just cover the flakes. Let them soak for 10 minutes to soften.
- Blend the mixture until it’s a thick, slushy pulp.
- Strain through a nut milk bag or several layers of cheesecloth over a bowl. Squeeze hard to get every drop of rich, white milk.
- Cover the bowl and let it sit undisturbed for 24-48 hours. The cream will rise and solidify on top.
- Carefully scoop this solid cream layer into a clean jar. In a day or two, it will naturally separate into a clear oil top layer and a watery bottom.
- Decant the clear oil. This is your finished, raw coconut oil.
This process requires patience, but the reward is a supremely gentle oil perfect for sensitive facial skin. I keep a jar of this on my shelf specifically for my evening cleanse and to help manage the purging effects often associated with oil cleansing.
The Traditional Fermentation Method
This is a wonderfully passive coconut oil extraction process used for generations in tropical communities.
Instead of waiting for the cream to rise, you let the entire batch of coconut milk sit at room temperature.
The natural bacteria cause the milk to ferment and separate. After a day or two, you’ll see a clear oil layer floating above the curdled milk solids and water.
You simply skim or siphon the oil off the top. It might have a slightly tangy, fermented smell initially, but this dissipates.
The skin benefits remain completely intact. I learned this method from a friend whose family in Vietnam has made oil this way for decades.
The Speedy Heat Method (Using a Slow Cooker)
When you need oil fast for a project, this is the most direct answer to how do I make coconut oil.
You start with homemade coconut milk or even a good-quality canned full-fat version.
Pour the milk into a slow cooker on the “low” setting or a heavy pot on the stove over the lowest possible flame. The goal is to gently simmer off the water, not fry the solids.
Stir it every 30 minutes. After a few hours, the milk will reduce, the solids will begin to brown, and golden oil will pool around them.
Constant, low heat is your friend here; high heat will burn the milk solids and give your oil a sharp, unpleasant taste.
Once the solids are crispy and golden, strain the oil through cheesecloth. It will be clear and liquid, with a lovely toasted aroma perfect for hair masks and scrubs.
Common Coconut Oil Extraction Mistakes and How to Avoid Them
I’ve made most of these mistakes myself, so learn from my messy kitchen experiments.
Using immature coconuts is a common start. The meat is thin and soft, yielding very little oil. Always choose mature, brown coconuts that feel heavy and slosh with water. The thick, firm meat is packed with oil.
Not straining well leads to bits of coconut flesh in your milk, which can spoil faster. Use a nut milk bag or layer 4-5 pieces of cheesecloth. Squeeze patiently.
Applying too much heat in the speedy method is the biggest risk. If you see rapid boiling or smoke, the heat is too high. You’ll end up with a dark oil that smells burnt.
Improper storage ruins your hard work. Coconut oil is stable, but light and heat can degrade it. Always store your homemade oil in a clean, airtight glass jar in a cool, dark cupboard. My pantry shelf works perfectly. There’s a complete guide on refrigerating coconut oil, storage shelf life, and preventing rancidity. It ties directly into keeping your oil fresh.
Finally, manage your expectations on yield. It takes about 10-12 mature coconuts to make one liter of oil. The process is rewarding, but for large quantities, buying a trusted, cold-pressed brand is often the smarter choice.
Bringing Your Oil to Life: Simple DIY Body Care Recipes
The magic truly begins here. Whether you’re using your own freshly extracted coconut oil or a trusted store-bought jar, these recipes transform that simple ingredient into luxurious, personalized care. You might wonder about the best substitutes or alternatives to coconut oil for cooking and skincare. We’ll explore how this ingredient stacks up and what other options you might consider.
Before you begin, two non-negotiable rules: always do a patch test on a small area of skin, and ensure all your jars, tins, and utensils are squeaky clean and dry. This keeps your creations safe and shelf-stable.
A Soothing Vanilla & Coconut Hair Oil
This blend is my go-to for a dose of hair comfort. The coconut oil penetrates the hair shaft, while vanilla just smells like a hug.
In a small bottle, combine ¼ cup of melted coconut oil with 3-4 drops of vanilla essential oil. Shake it gently to mix.
For a deep treatment, massage a generous amount into your scalp and hair, wrap it up, and leave it for 30 minutes before shampooing. For daily frizz control, simply warm a tiny dab between your palms and lightly smooth it over the ends.
Coconut Coffee Body Scrub to Wake Up Your Skin
This scrub is invigorating. The fine grit exfoliates, while the coconut oil leaves a protective, silky layer behind.
Mix together ½ cup of fine coffee grounds, ¼ cup of brown sugar, and ⅓ cup of solid coconut oil. It should look like wet sand.
Use this scrub in the shower on damp skin, rinsing thoroughly to avoid any oily residue on your tub. The coffee aroma is grounding, and your skin will feel incredibly smooth and awake.
Ultra-Nourishing Herbal Coconut Body Butter
This is a weekend project with stunning results. I like to infuse the oil first with a skin-loving herb like calendula for an extra healing touch.
Gently heat ½ cup of coconut oil with ½ cup of shea butter until just melted. If infusing herbs, do this step first, then strain. Let the mixture cool in the fridge until it’s firm but still soft, like chilled butter.
Whip it with a hand mixer for several minutes until it becomes pale, fluffy, and holds soft peaks. This whipping incorporates air, giving you a rich butter that melts on contact without feeling heavy or greasy.
Peppermint Coconut Lip Balm in a Tin
If you’re curious about soap making but want a gentler start, lip balm is the perfect introductory project. It’s simple and foolproof.
In a double boiler, melt together one tablespoon of coconut oil and one tablespoon of grated beeswax. Once liquid, remove from heat and stir in 5-6 drops of peppermint essential oil.
Carefully pour the mixture into clean lip balm tins or tiny jars and let them set completely. You’ll have a moisturizing, protective balm with a refreshing tingle. I keep one of these on my shelf year-round.
When Homemade Isn’t Practical: Choosing a Store-Bought Oil
Extracting oil at home is wonderfully satisfying, but it’s not always the most efficient choice for your regular DIY projects. The process takes time, and the yield can be small.
For consistent results in your recipes, a high-quality store-bought oil is often the more practical path. It ensures you always have enough on hand without the labor.
When you shop, look for key words on the label. “Cold-pressed,” “unrefined,” and “virgin” mean the oil was processed with minimal heat, preserving its natural scent, nutrients, and antioxidants. A glass jar is also a good sign, as it protects the oil from plastic leaching. Understanding how cold-pressed oil differs from refined oils matters for flavor and nutrients. The processing method can influence aroma, nutrient retention, and cooking performance.
Knowing how you can make coconut oil gives you a deeper appreciation for every jar, whether it comes from your kitchen or a store. You understand the work and beauty behind it, making you a more informed and mindful user.
Quick Answers from Your Botanical Guide
Should I buy a coconut oil extraction machine for home use?
For a home apothecary, a specialized machine is unnecessary and costly. The hands-on kitchen methods I describe are more than sufficient for creating pure, small-batch oil for your DIY recipes.
What’s the difference between using fresh coconut and dried copra?
Starting with fresh, mature coconut gives you the purest, most vibrant oil with a lovely aroma for body care. Commercial operations often use copra (dried meat), which typically requires high heat and refining, stripping away some of the oil’s natural benefits and scent. This is especially important when using coconut oil for delicate areas like dry lips.
How is coconut oil traditionally extracted in places like Vietnam?
Traditional methods, like the fermentation process I outlined, have been used for generations. While some small-scale producers may still use these artisanal techniques, modern large-scale production in Vietnam and elsewhere now predominantly uses mechanical pressing for efficiency.
Where can I find a reliable video of the coconut oil extraction process?
Search for terms like “cold process virgin coconut oil at home” from trusted herbalism or whole-foods channels. Seeing the separation of the cream and oil can be incredibly helpful, but always cross-reference with reputable written guides for safety.
Is making oil at home practical for starting a small business?
While deeply rewarding, homemade extraction is generally not scalable for a viable business due to low yield and high labor. For a business, investing in commercial-grade equipment is essential for producing consistent, large volumes efficiently.
The Essence of Home Extraction
Your most powerful ingredient will always be your own care and attention. The slow process of making coconut oil yourself builds a connection to your wellness rituals that a store-bought jar simply can’t match.
I encourage you to trust your senses and begin with one simple recipe from your own kitchen shelf. The confidence you gain will be the foundation for all your future botanical projects.
Deep Dive: Further Reading
- How to Make Coconut Oil From Scratch… : 10 Steps (with Pictures) – Instructables
- 4 Ways to Extract Oil from a Coconut – wikiHow
- No Preservatives, No Additives – Make Pure Coconut Oil At Home With Our Step-By-Step Guide
- How to Make Coconut Oil – Alphafoodie
Noemi is an accomplished wellness researcher, nutrition care guide and body care expert. She has years of experience in formulating various oil combinations for full body wellness including face, hair, body care, essential oils and cooking oils. She works as a bio-formulator working with oil chemistry and analyzing the best formulations when it comes to your needs. Feel free to reach out to get your oil needs sorted.