Can You Make Essential Oils at Home?
I remember feeling overwhelmed when I first considered extracting oils from my garden herbs. Let me reassure you, turning plants into potent oils is a straightforward process you can manage with common household items.
This guide breaks down three reliable techniques so you can match the method to your plant material.
- The basics of steam distillation
- Simple cold pressing for citrus
- An introduction to solvent extraction
What Exactly Are Essential Oils and How Are They Made?
Think of an essential oil as a plant’s bottled personality. It’s the highly concentrated aromatic essence that gives lavender its calm, rosemary its sharpness, and a rose its deep perfume.
Plants make and store these oils in tiny sacs within their flowers, leaves, bark, or peels. They use them to attract pollinators, heal wounds, or protect themselves from pests. We extract them to capture that pure, powerful scent and its properties for our own use. Definitions of botanical oils can vary, but their common uses—aroma, skincare, and wellness—are seen across many plant oils.
On a big scale, most oils are made through steam distillation or cold pressing. Steam gently coaxes the oil out of plant material, while pressing literally squeezes it from citrus peels. These methods set the stage for our home versions.
I grow rosemary by my back door. Crushing a fresh sprig releases a bright, green scent. The essential oil I distilled from last year’s harvest is different-deeper, woodier, and more concentrated. That transformation from garden herb to vial of oil is the magic of extraction. These key characteristics—the bright, green aroma and the deeper, woodier note—give rosemary oil a homey presence in everyday life. They help explain why people reach for it in cooking, cleaning, or diffusing at home.
Can You Really Make Your Own Essential Oils at Home? The Honest Truth
You can, but let’s get our expectations in the right place. With some patience and the right materials, you can create beautiful, aromatic extracts.
Your homemade oil will often be a fragrant hydrosol or an infused oil, not the ultra-potent essential oil you buy in a tiny bottle. The yield is very small. A basket of lavender buds might give you just a few precious drops of real oil, but a lovely bottle of lavender scented water.
Start with plants that are generous with their aroma. Lavender and mint are forgiving for steam methods. For pressing, nothing beats fresh citrus peels from organic oranges, lemons, or grapefruits. The zest sprays its oil right into the air when you grate it.
This isn’t a hobby for cutting corners. You’re working with heat, glass, and concentrated botanicals. Clear your workspace, go slow, and respect the process for safe and rewarding results.
Gathering Your Garden Apothecary: Essential Oil Distillation Equipment for Home
Your home distillation journey can start with items from your kitchen or expand into a dedicated hobbyist’s corner. I’ve used everything from a simple stockpot to a purpose-built copper still over the years.
The equipment range is broad. On one end, you have improvised stovetop methods. On the other, you find complete distillation kits designed for home use.
Choosing a dedicated kit involves a few practical considerations. Think about what you’ll be distilling most.
- Size: A 2-liter still is great for experimenting with herbs like mint or lemon balm. A 5-liter model is better for larger harvests, like a basket of rose petals.
- Material: Glass kits let you see the condensation process, which I find mesmerizing. Stainless steel is more durable and easier to clean after tackling something resinous like pine needles.
- Budget: Your investment should match your commitment. A basic setup is a wise start.
I often get asked about price. Small, entry-level distillation machines typically start under a couple hundred dollars. You can find them for sale through online marketplaces that cater to herbalism or hobby farming.
The right tools make the process smooth and safe, turning a experiment into a reliable ritual.
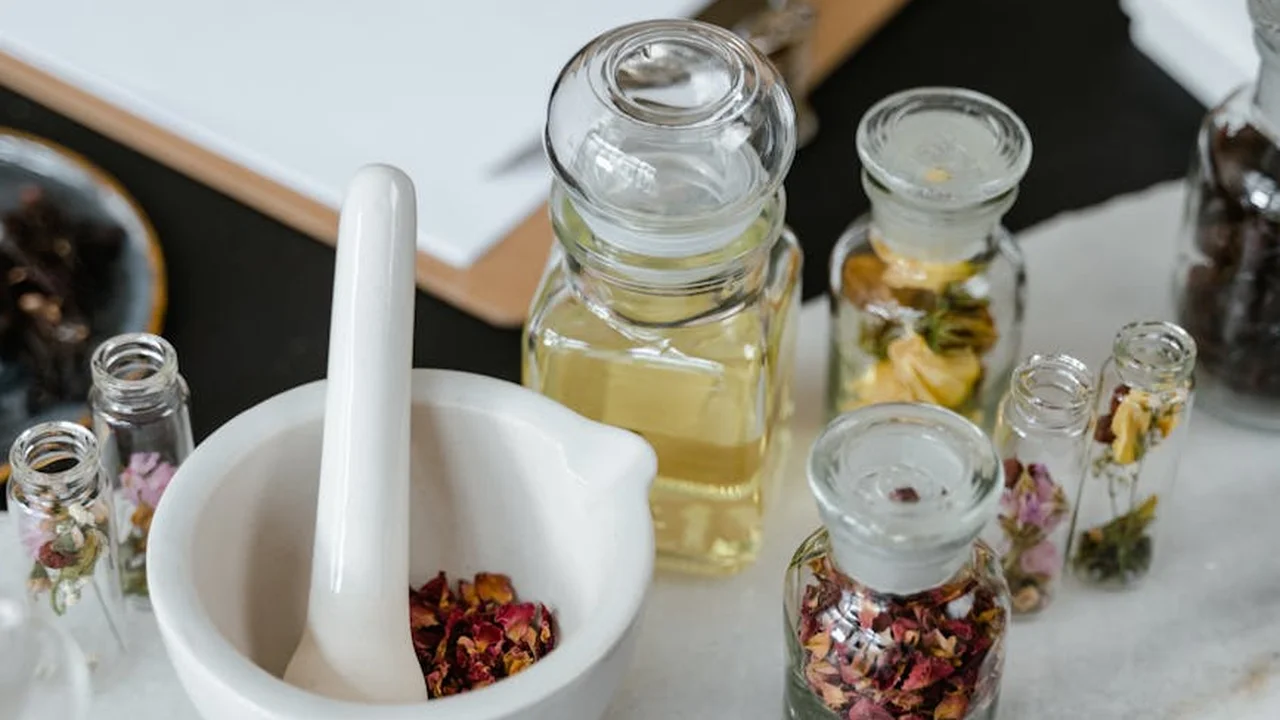
Beyond the still itself, gather these helpers from my own shelf. You’ll need mason jars for initial collection. Have plenty of cheesecloth or a fine mesh strainer for filtering. Most importantly, use dark glass bottles with tight seals for storing your final oil. Light degrades those delicate aromatic compounds.
Setting Up a Simple Stovetop Still
You can create a basic still with common kitchen items. Imagine a large pot as your boiler. Place a heat-safe glass bowl inside, floating in the water. Fill the pot with your plant material and water, but don’t let water spill into the bowl.
Put the lid on the pot upside down. This creates a slope. Now, pile ice or ice packs onto the inverted lid. As the water boils, steam carries the plant’s volatile oils upward.
The cold lid causes the steam to condense back into liquid, which then drips down into your waiting glass bowl.
This method is a gentle introduction. You will likely produce a fragrant floral or hydrosol water with a visible oily film on the surface. It’s perfect for a first try with lavender or citrus peels.
Safety is non-negotiable. Only use heat-safe glass like Pyrex for the collection bowl. Never leave a distillation process unattended. The combination of high heat and water requires your constant attention.
How to Make Essential Oils by Steam Distillation: A Step-by-Step Guide
Steam distillation is the classic method for coaxing oil from aromatic plants, and you can do a small-scale version at home.
I use a modest copper still on my stovetop, but basic glass kits are available too.
The core idea is simple: gentle steam passes through plant material, vaporizing the volatile oils, and then the vapor is cooled back into liquid water and oil.
Gathering and Preparing Your Plant Material
Start with freshly harvested herbs for the best yield and vibrancy.
Give your plant material a rough chop or crush to break open the tiny oil sacs, which helps the steam do its job more effectively.
Avoid packing the plant chamber too tightly; you want the steam to flow freely through all the leaves or flowers.
Setting Up Your Distiller
Your setup will have a boiling chamber for water, a plant material chamber, a condenser tube, and a collection vessel.
Place your prepared herbs in their chamber, making sure all seals and connections are snug to keep the precious steam from escaping.
Fill the boiling chamber with clean water, about halfway, and assemble everything according to your kit’s instructions.
Managing Heat and Condensation
Turn on the heat to bring the water to a steady, rolling boil.
You’ll see steam begin to rise through the plant material and travel into the condenser. The key here is a patient, consistent heat-too high, and you might cook the herbs; too low, and you won’t produce enough vapor.
In the condenser, which is often cooled by a surrounding sleeve of cold water, the steam rapidly cools and turns back into a liquid.
Collecting Your Essential Oil
This liquid, called hydrosol, drips into your collection vessel. Hydrosol is the floral water, like lavender or rose water, which is wonderful for skin and home.
Because essential oil and water do not mix, the oil will float on top of the hydrosol. You will see tiny, shimmering droplets of oil coalescing into a visible layer on the water’s surface.
Use a clean glass pipette or a small syringe to carefully skim off this top layer of pure essential oil.
Store your oil immediately in a dark glass bottle, labeled with the plant and date.
My Go-To Plants for Home Steam Distillation
If you’re new to this, start with plants that are generous with their oils and forgiving to work with.
My top three recommendations are lavender, rosemary, and lemon balm. I grow all three in my garden just for this purpose.
Lavender is wonderfully cooperative; pick the flower spikes just as the buds begin to open on a dry, sunny morning for the highest oil content.
Rosemary’s sturdy leaves distill easily, and the fresh, herbaceous scent is incredible for a morning diffuser blend or a hair rinse.
Lemon balm is a cheerful plant that yields a precious, calming oil with a soft, lemony-green aroma.
The scent you get from home distillation is special. It’s often lighter and more nuanced than a store-bought oil, capturing the true spirit of your garden in that very season.
Don’t be discouraged by small yields. It takes a great deal of plant material to make a little oil-that’s part of what makes these botanical essences so valuable.
How to Make Essential Oils by Cold Pressing Citrus Peels
If you want to make a true essential oil at home, cold pressing is your best and easiest starting point.
This mechanical method captures the bright, volatile oils from citrus rinds without any heat.
It feels direct and satisfying, like you are coaxing sunshine right out of the peel.
My favorite way is wonderfully simple. You only need a fine zester and a small glass jar.
Take your organic orange, lemon, or grapefruit and zest just the colored outer skin, avoiding the bitter white pith.
Place the zest directly into your jar. Then, use the back of a spoon to firmly press and twist the zest against the glass.
You will immediately see a fine mist of oil spray the inside of the jar and smell that incredible, joyful burst of scent.
This method is purely mechanical, unlike solvent extraction used for delicate flowers like jasmine.
Solvent extraction uses chemicals to pull out aromatic compounds, which is a complex lab process.
Cold pressing with a zester is completely safe for a home kitchen and gives you a pure, undiluted oil.
The aroma it creates is pure happiness, turning your kitchen into a bright, fragrant studio.
A Simple Citrus Oil Extraction Checklist
Follow these steps to gather your own tiny batch of citrus oil. Patience is your main ingredient.
- Always choose organic citrus fruit. The peels are where pesticides concentrate, so this is non-negotiable for a skin-safe oil.
- Wash and dry the fruit thoroughly under warm water to remove any surface residue.
- Using a fine zester or microplane, gently remove only the vibrant outer zest.
- Place the zest into a clean, dry glass jar and press firmly with a spoon to rupture the oil sacs.
- Seal the jar tightly with a lid to trap the aromatic compounds inside.
- Store your jar in a dark, cool place like a cupboard for 24-48 hours; this lets the oil separate.
- After resting, carefully pour off the tiny amount of oil that has collected.
Your yield will be small-just a few precious drops from several fruits is a complete success.
I keep my drops in a tiny amber bottle on my mixing shelf. Those few drops are potent enough to scent a batch of homemade cleaner or add a lift to a body oil blend.
Understanding Solvent Extraction at Home: A Careful Approach
Solvent extraction is the method professionals use to capture the delicate scent of flowers like jasmine or rose that are too fragile for steam.
It creates thick, aromatic absolutes prized in perfumery. This process is complex and involves volatile chemicals, making it the most challenging method to attempt safely at home.
The Food-Grade Alcohol Method
If you are curious, the only solvent I would consider at home is high-proof, food-grade alcohol like ethanol.
It’s a method more suited for creating fragrant tinctures than pure absolutes.
You simply submerge your plant material in the alcohol, seal it in a jar, and let it sit for several weeks in a dark place, shaking it gently every few days.
Afterward, you strain out the solids, leaving a perfumed liquid. The result is an aromatic infusion, not a true essential oil, but it can be a beautiful addition to homemade room sprays or linen mists.
A Safer, Ancient Technique: Enfleurage
For a truly ancient and chemical-free approach, consider enfleurage.
This uses odorless fat, like coconut oil or shea butter, to absorb scent from fragile petals.
I keep a small ceramic dish of solid coconut oil on my shelf for this. You press flower petals into the surface of the fat, cover it, and let the fragrance transfer over a day or two.
You then replace the spent petals with fresh ones, repeating this process for weeks until the fat is richly scented.
Critical Safety FAQs
Can I use rubbing alcohol or other solvents from the hardware store?
No. These are toxic and can leave dangerous residues. They are not safe for use on skin or in your home environment.
Is the alcohol method dangerous?
High-proof alcohol is extremely flammable. This is the point where, for most people, seeking a professionally made oil is the wisest and safest path.
When to Seek Professional Help or Buy Instead
Making oils at home is rewarding, but knowing when to step back is a sign of wisdom.
You should buy, not DIY, if any of these are true:
- You need a therapeutic-grade oil for specific wellness or skin care applications. Consistency and purity are critical here.
- The plant material is toxic (like pennyroyal) or could irritate your skin during handling.
- The process requires volatile chemical solvents beyond simple alcohol.
- You feel any uncertainty about the safety of your setup or materials.
Some extraction methods, like supercritical CO2, require immense industrial pressure chambers. It is perfectly okay that some beautiful oils are beyond our home kitchens; that’s what trusted artisans and distilleries are for, especially when it comes to methods like steam distillation and cold pressing.
Having a shelf of quality, purchased oils for your daily routines is a smart choice. I buy my rose absolute and jasmine sambac. I use my homemade lavender for linen sachets. There is room for both in a thoughtful practice, especially when you choose safe and right essential oils for your diffuser.
Common Pitfalls in DIY Essential Oil Making and How to Avoid Them
Making your own oils is incredibly rewarding, but it’s also a practice in patience and precision. I’ve made every mistake you can think of over the years, and each one taught me how to get better results.
Let’s walk through the most common hiccups so you can sidestep the frustration.
Not Using Enough Plant Material
This is the number one reason for disappointing yields. Essential oils are incredibly concentrated. You need a surprisingly large volume of plant material to produce just a few precious drops of oil.
I once spent an entire morning harvesting lavender, feeling proud of my full basket. After distilling, I was left with a tiny, barely visible film of oil. It was a gentle reminder of nature’s potency.
- The Fix: Always harvest more than you think you need. For leafy herbs like mint or rosemary, aim to loosely fill your distillation pot. For delicate flowers like lavender or chamomile, you’ll need even more.
Applying Incorrect or Inconsistent Heat
Heat is your tool, but it must be controlled. Too high, and you risk “cooking” your botanicals, which can distort the aroma and degrade the oil’s therapeutic properties. Too low, and the steam won’t carry the volatile oils effectively, potentially leading to oxidation.
I keep a simple candy thermometer clipped to my homemade still. It’s a game-changer.
- The Fix: Use a thermometer to monitor your water temperature. For most steam distillation, you want a steady, gentle boil that produces a consistent flow of steam, not a violent, rolling one.
Using Fresh, Undried Herbs (A Personal Story)
Here’s a story from my own shelf. Early on, I was eager to make a rose geranium oil. I used freshly cut leaves, thinking more moisture meant more essence. A week after my infusion, I opened the jar to a heartbreaking sight: a fuzzy white film of mold growing on top.
The leaves held too much water, which created a breeding ground for bacteria. Any plant material with high water content needs to be wilted or partially dried first to prevent spoilage and mold.
- The Fix: For methods like enfleurage or solvent extraction, let your flowers or leaves sit in a single layer on a screen for 12-24 hours to reduce surface moisture before using them.
Poor Storage Leading to Rancidity
Your beautiful, homemade oil is fragile. Light, heat, and air are its enemies. Storing it in a clear bottle on a sunny windowsill will ruin your hard work, making the oil smell “off” or rancid.
Proper storage is non-negotiable for preserving the aroma and wellness properties of your oil. It’s the difference between a product that lasts for a year and one that spoils in a month. Understanding myth vs fact about essential oil expiration and practical storage tips can help you make informed choices. Knowing shelf life details helps you avoid waste and preserve potency over time.
- The Fix: Always store your finished oil in dark amber or cobalt glass bottles. Fill them as full as possible to minimize air exposure, and keep them in a cool, dark cupboard.
The Disappointment of No Oil Separation
You’ve followed all the steps, waited patiently, and then… nothing. No golden layer floats to the top of your collection water. This is very common, and it usually points to your setup.
Don’t be discouraged. It’s a puzzle to solve.
- Troubleshoot Your Setup: First, check all your seals and connections for steam leaks. Second, ensure your cooling water is truly cold; if it’s too warm, the vapor won’t condense efficiently. Finally, double-check that you used enough plant material-this is most often the culprit.
Using Your Homemade Essential Oils Safely for Body, Skin, Hair, and Home
That precious little bottle of oil you made is a beautiful accomplishment. Now, let’s use it wisely. Your homemade oil is a powerful botanical extract, and treating it with respect is how we enjoy its benefits safely.
The golden rule for skin and hair is to always dilute your essential oil in a neutral carrier oil before applying it. A great starting point is a 1% dilution. For every teaspoon of carrier oil (like jojoba or sweet almond), you would add just 1 drop of your essential oil. This gentle ratio is perfect for beginners and is recommended for most essential oils when used for skin and hair care. Understanding the proper dilution ratios and how to mix them with carrier oils is essential for safe and effective use.
Your oil has so many uses waiting for it. For wellness, add a few drops to a diffuser to freshen a room with your garden’s scent. At home, mix it with vinegar and water in a spray bottle for a fragrant, natural cleaner. For your hair, blend a single drop into a dollop of your regular conditioner or a tablespoon of argan oil for a deep treatment.
It’s helpful to remember that your homemade oil will likely be milder than the highly concentrated ones you buy. This isn’t a flaw. Think of your oil as a gentler, more personal version of its commercial cousin, perfect for crafting blends that feel uniquely yours.
Ready for a simple, sunny blend? In my own routine, I love to mix a drop of my cold-pressed lemon balm oil with a tablespoon of fractionated coconut oil. It makes a refreshing, lightweight moisturizer for my arms after gardening. The scent is pure, leafy sunshine.
A Beginner’s Checklist for DIY Essential Oil Success
Walking through the process step-by-step makes it feel much more manageable. Here is a simple path to follow for your first try.
- Choose your method. Match it to your plant. Use steam for herbs like lavender or mint. Cold press is for citrus peels. Enfleurage or solvent extraction is for delicate flowers.
- Gather your clean equipment. Have everything washed and laid out before you start. This keeps the process smooth.
- Prepare your plant material. Use fresh, dry, or wilted plants as your method requires. Chop or crush them to help release their oils.
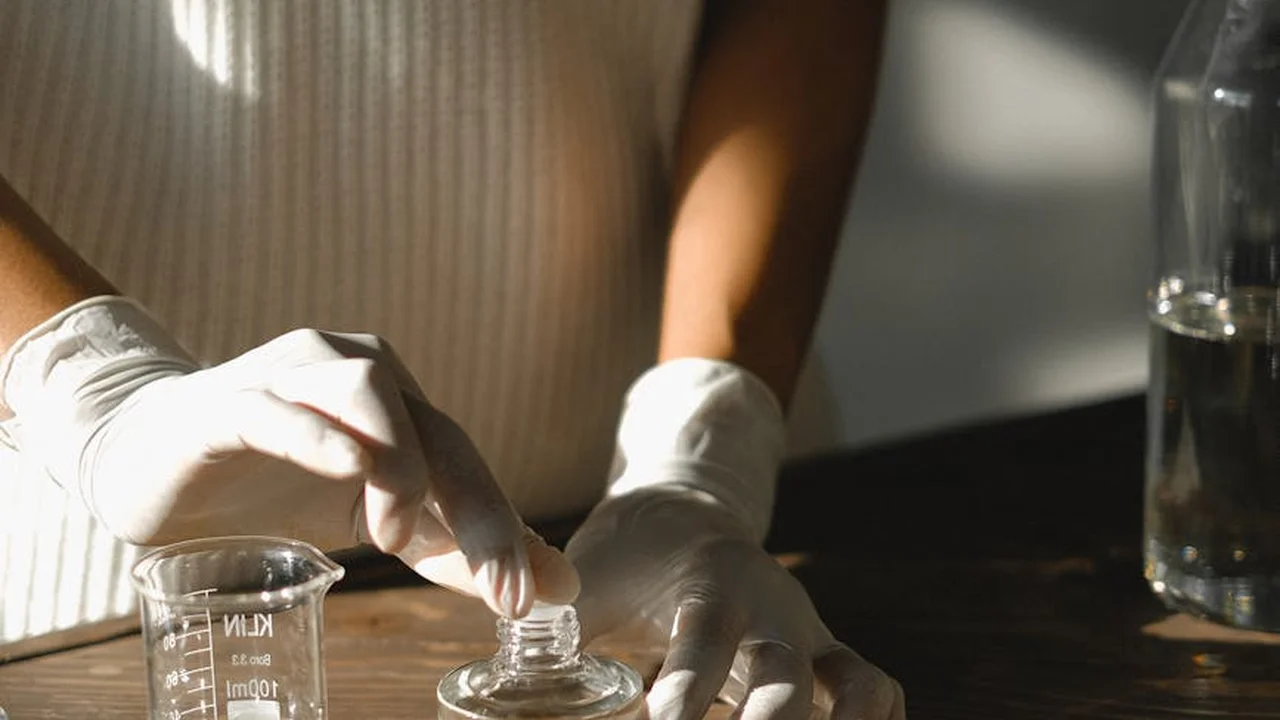
- Follow your safety steps. Wear protective gloves and glasses if needed. Work in a well-ventilated space, especially with heat or solvents.
- Perform the extraction patiently. Don’t rush. Let the steam do its work, or press your peels thoroughly. Good things take a little time.
- Store your oil properly. Use dark glass bottles. Keep them in a cool, dark cupboard, away from heat and light to preserve the aroma.
- Label everything clearly. Write the plant name, the date you made it, and the method you used. Future-you will be grateful.
Before you use any new oil on your skin, do a patch test with your diluted blend. Apply a small dab to the inside of your elbow and wait 24 hours to check for any reaction. This simple habit builds confidence.
Your first batch might not be perfect, and that’s completely okay. Mine weren’t either. Every time you try, you learn a little more about the plants and the process. That learning is the real treasure you’re collecting on your shelf.
Your Questions, Plantwise
I followed the steps, but my oil yield is tiny. Is that normal?
Absolutely, and it’s the most common reality of home distillation. Essential oils are incredibly potent, so even a large basket of plant material often yields just a few precious drops, which is a complete success.
What’s the one piece of equipment I shouldn’t skip for steam distillation?
A proper condenser is essential for efficiently cooling steam back into liquid. While a makeshift lid-and-ice method can work, a dedicated condenser in a kit ensures you capture more of the precious aromatic compounds you’ve worked to release.
The article warns against solvent extraction. What’s the biggest risk?
The primary risk is residual toxic chemicals from improper solvents, which can concentrate in your final oil. For home use, high-proof food-grade alcohol is the only solvent to consider, and even then, it creates an infusion, not a pure essential oil.
I don’t want to buy a kit yet. What’s the best household item to repurpose?
A large stockpot with a tight-fitting, domed lid is your best starting point for a stovetop still. Placing a heat-safe bowl inside to collect the condensate and using ice on the inverted lid can create a functional, introductory system.
How do I know if my homemade oil has gone bad?
Trust your senses. If the aroma has faded significantly, become sour, or the oil seems unusually thick or cloudy, it has likely oxidized. Want a quick guide to tell if your botanical oils have gone bad and turned rancid? We’ll walk you through quick signs and tests in the next steps. Proper storage in dark glass bottles is your best defense against rancidity.
A Personal Note from My Apothecary Shelf
The heart of making essential oils at home is a gentle, patient process that protects the plant’s natural benefits. I always begin with fresh, organic material and meticulous hygiene to ensure every batch is pure and safe for skin, hair, and home use.
Your journey with botanical oils is deeply personal, and this blog is a resource for your continued exploration. Trust the guidance you find here, and equally trust your own senses as you craft oils that bring wellness into your daily life.
Relevant Resources for Further Exploration
- Homemade Herb Oils : 5 Steps (with Pictures) – Instructables
- r/DIYfragrance on Reddit: Making your own essential oil/good carrier oils?
- DIY essential oil at home
Noemi is an accomplished wellness researcher, nutrition care guide and body care expert. She has years of experience in formulating various oil combinations for full body wellness including face, hair, body care, essential oils and cooking oils. She works as a bio-formulator working with oil chemistry and analyzing the best formulations when it comes to your needs. Feel free to reach out to get your oil needs sorted.