
How Do You Use Rosehip Oil and Other Botanical Face Oils Every Day?
Are you hesitant to add a face oil, worried it might feel greasy or break you out? I keep a small bottle of rosehip oil on my bathroom shelf because its light texture absorbs quickly, leaving skin soft, not slick.
You can easily fit botanical oils into your existing routine for a noticeable glow. In this article, we’ll explore:
- Where face oils belong in your skincare order
- Simple methods for applying rosehip and other oils
- How to pair different botanical oils with your skin’s needs
- My personal favorites for morning and evening use
Key Takeaways: Your Glow-Up Starts Here
- Face oils are for all skin types, even oily or blemish-prone skin. They work with your skin, not against it.
- These oils are brilliant at sealing in moisture. Think of them as the final, protective layer in your routine.
- Rosehip oil is a standout for gently fading scars and brightening a dull complexion. I always have a bottle on my shelf.
- Applying your oil in the correct order-after water-based serums but before or mixed with moisturizer-makes all the difference.
Safety with pure essential oils is non-negotiable; they must be diluted in a carrier oil like jojoba before touching your skin. A drop of lavender is powerful. More is not better.
Your skin’s needs change daily. Tweaking your routine based on what you feel and see is not just normal, it’s smart.
What Are Botanical Face Oils, Really? (It’s Not Just Fancy Grease)
Your skin has a natural barrier made of lipids, which are fancy fats. This barrier keeps good moisture in and irritants out. When it’s weak, your skin feels tight, rough, or reactive.
Botanical oils directly support this barrier. Imagine patting your face with a damp cloth-that’s like applying a hydrating serum. Applying a face oil afterward is like placing a comforting seal over that damp sponge to keep the water from evaporating.
You’ll see two main types: single-origin carrier oils and blended face oils. A bottle of plain rosehip or jojoba oil is a single carrier. A “face oil” blend typically mixes several carriers with a tiny, safe amount of essential oils for extra benefits.
The sensory experience tells you everything. A good oil feels silky, not slimy. It absorbs with a soft finish, not a greasy film. My pure rosehip oil has a faint, earthy, almost tea-like scent and a rich golden color. If an oil smells overwhelmingly perfumed or rancid, it’s past its prime.
How to Pick Your Perfect Botanical Face Oil

Choosing an oil feels personal. The best one for you listens to what your skin is saying right now.
I keep a small selection on my apothecary shelf for different days and seasons. For combination skin that’s dry in some spots and oily in others, rosehip seed oil is a brilliant middle ground. It absorbs quickly without leaving a greasy film. For intense dryness, sea buckthorn oil is deeply restorative, with a rich, orange-red color that feels like a nutrient boost.
You might wonder, how can we use olive oil for face care? In my home, it’s a cherished, heavy-duty option. Its thicker texture makes it ideal for very dry, mature skin or as a luxurious first step to melt away makeup and sunscreen at night.
For Skin That Shines Too Soon: Oily and Acne-Prone
It sounds counterintuitive, but the right oil can calm an oily complexion. The trick is to pick ones that are light and mimic your skin’s natural sebum.
Grapeseed oil is a classic. It feels almost like water and sinks in with no residue. Hemp seed oil is another favorite of mine for its perfect balance of omega fatty acids.
When you give your skin a high-quality, non-comedogenic oil, it can signal your pores to slow down their own oil production over time. Start with just two or three drops on damp skin to see how your skin responds. Ensure you pick ones that won’t clog your pores, especially if you have oily or acne-prone skin.
For Skin That Craves Comfort: Dry and Mature
This skin type needs oils rich in nourishing fatty acids that repair the skin’s barrier. Think of them as a comforting drink for your complexion.
Camellia oil, often called “Japanese tsubaki,” is silky and luxurious. Rosehip oil is packed with vitamins that support skin renewal. Their viscosity is thinner than honey but richer than water, allowing them to penetrate deeply without just sitting on top.
These richer oils work beautifully pressed into slightly damp skin at night, helping to soften fine lines and soothe that tight, dry feeling by morning. I often mix a drop of rosehip into my night cream for an extra layer of comfort.
The Gentle Art of How to Apply Face Oil
Applying a face oil is a small ritual. Get it right, and your skin drinks it up. The secret starts with your canvas. Always begin with clean, slightly damp skin. A few mists of toner or rosewater are perfect. That bit of moisture helps the oil spread and absorb beautifully.
Here is my nightly go-to method.
- Cleanse your face gently and pat it dry, leaving it a touch damp.
- Apply any treatment serums you use, like vitamin C or hyaluronic acid.
- Pour 3-4 drops of your chosen face oil into your clean palms. For a lighter oil, you might use 5-6 drops.
- Rub your palms together to warm the oil. This wakes up the aroma and thins the texture slightly.
- Now, press your palms firmly and evenly over your face, neck, and décolletage. Avoid dragging or rubbing.
- Let the oil sink in for a minute before your next step.
Press, do not rub. This gentle pressing motion helps the oil adhere to your damp skin without tugging or disrupting the serum underneath. I hold my hands over my cheeks for an extra second, just breathing in the scent. It makes all the difference.
Your choice of oil changes the technique a little. A light oil like grapeseed or jojoba is like silk. It absorbs quickly. You can apply it almost like a toner, using a few more drops smoothed over the skin. A richer oil, like rosehip or sea buckthorn, is more substantive. With these denser oils, stick to 3-4 drops warmed well, and take your time pressing it in. If your skin feels too slick, you used too much. Blot gently with a tissue.
Where does the oil fit in your routine? Think of it as a barrier and a booster. It goes on after your water-based serums. Then, you have a choice. You can let it absorb fully as your last step. Or, you can seal it in with your moisturizer. For very dry skin, I sometimes mix one drop of oil right into my cream in my palm. It creates a supercharged treatment.
Your Quick-Start Application Checklist
This simple sequence works for morning or night. Follow it, and you will never wonder where your oil belongs.
- Cleanse: Start with a fresh face.
- Tone: Mist or pat on a hydrating toner. Damp skin is your friend.
- Treat: Apply any targeted treatment serums.
- Oil: Warm 3-4 drops between your palms and press onto face and neck.
- Seal: If your skin needs more, follow with moisturizer.
For daytime, there is one non-negotiable final step. Always apply your sunscreen on top, once your oil and moisturizer have settled. The oil will help your SPF spread evenly, and the SPF will protect all the good work your botanical oils are doing.
Crafting Your Rosehip Oil Routine: A Simple Blueprint
When you ask about a rosehip oil routine, I picture two clear paths. One harnesses the morning light, and the other focuses on deep nighttime repair. You can choose one or blend both for glowing skin.
Let’s clear up questions I see often. “Can I use it with vitamin C?” is a popular one. Yes, you absolutely can-just apply your vitamin C serum first, let it absorb for about a minute, then gently layer the rosehip oil over it. This lets the serum work directly on your skin while the oil seals it in.
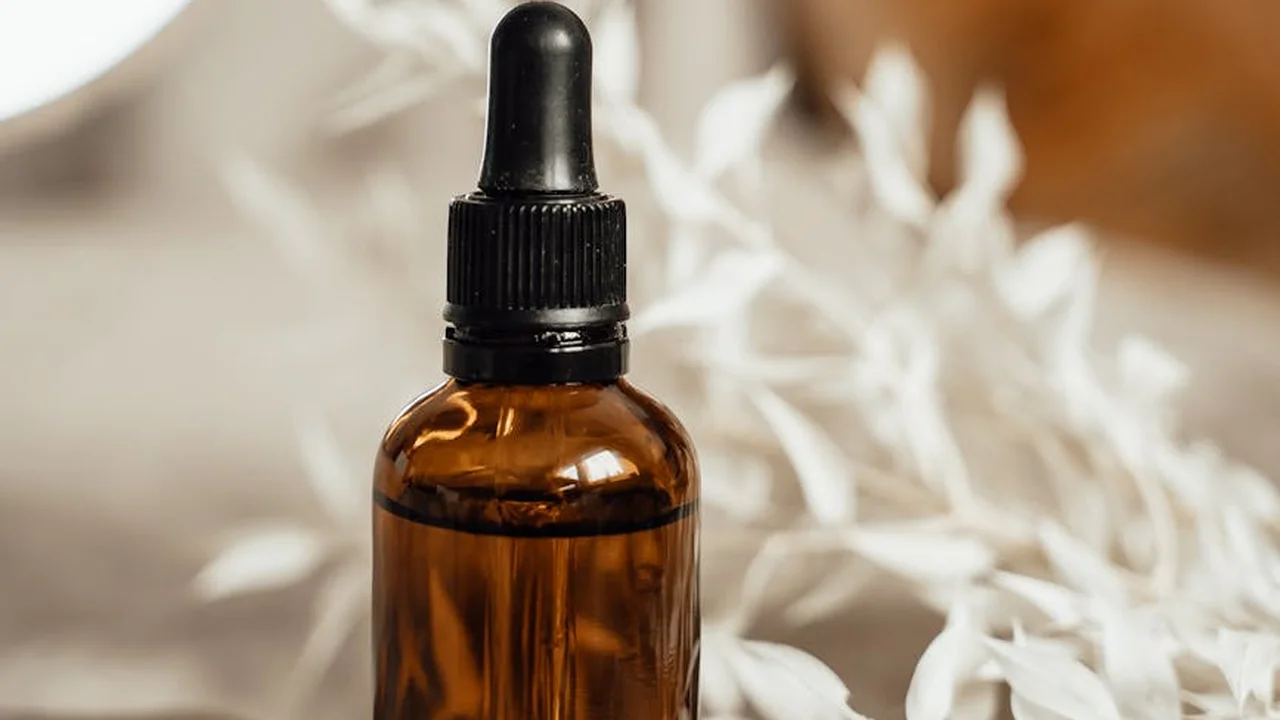
Now, how much to use? From my own shelf, the small amber dropper bottle is my go to. Start with 2 to 3 drops for your entire face and neck. Warm it between your palms-it feels light and dry-then press it onto slightly damp skin. Your skin will tell you if it needs more. If it feels tight after a minute, add one more drop. If it feels slick, use less next time.
For Morning Light
This routine is about fast, protective hydration. It prepares your skin for the day ahead without any fuss.
- Cleanse with a gentle, water based cleanser. Pat your skin until it’s just slightly damp.
- Apply your vitamin C serum. Wait until it feels tacky or dry, usually about 60 seconds.
- Dispense 2-3 drops of rosehip oil. Rub your hands together to warm it, then gently press and pat it all over your face and neck.
- If your skin type is dry, follow with a light moisturizer. For oilier skin, you can often skip this step.
- Finish with a broad spectrum SPF of 30 or higher. This is non negotiable.
The rosehip oil here acts as a sealant, locking in the vitamin C and providing a dewy, smooth base for your sunscreen or makeup. It’s the step that gives my complexion a hydrated glow all day.
For Nighttime Repair
Night is when your skin does its deepest healing. This routine is nurturing and reparative.
- Start with a double cleanse. First, use an oil balm or micellar water to dissolve sunscreen and makeup. Follow with a gentle, creamy face wash.
- Apply your treatment serum. This might be a retinoid, a peptide blend, or a treatment for specific concerns. Allow it to absorb fully into your skin.
- Follow with rosehip oil. Again, use 2-3 drops warmed in your hands. Press it gently onto your skin. It feels comforting, like a soft blanket.
- If you desire extra nourishment, you can layer a richer night cream over the oil. I do this in colder months when my skin needs more support.
In this ritual, rosehip oil serves as the calming, reparative layer that soothes skin and supports recovery from other active ingredients. It’s the final, loving touch my skin needs before rest.
Playing Safe: Dilution, Patches, and What to Skip
Think of a pure essential oil as a concentrated extract, like a powerful herb tincture. You wouldn’t drink an entire bottle of tincture in one go. Applying an undiluted essential oil directly to your skin, known as using it “neat,” is similar-it’s simply too strong and risks irritation or sensitization.
For facial skin, you should always dilute an essential oil in a carrier oil like jojoba, rosehip, or argan. This is the only safe way to apply lavender essential oil on your face, or any other potent botanical essence.
Your Simple Dilution Guide
For daily facial care, a low dilution is perfect. I use a simple ratio on my own shelf: 1 to 2 drops of essential oil for every teaspoon (about 5 ml) of your chosen carrier oil.
Start with one drop. You can always add a touch more next time if you wish, but you can’t take it out once it’s mixed. This gentle approach respects your skin’s delicate balance.
The Non-Negotiable Patch Test
Before any new oil touches your face, give it a trial run. This quick step can save you days of discomfort.
- Mix one drop of your chosen essential oil with a half teaspoon of carrier oil.
- Apply a dab of this mixture to the inside of your forearm or behind your ear.
- Leave it undisturbed for 24 hours.
Pay attention to what happens. A slight, fleeting warmth or tingling from oils like peppermint or frankincense can be normal. A persistent red, itchy, raised, or burning rash is not. If you see a bad reaction, wash the area with a mild soap and discontinue use of that blend. Listen to your skin-it’s giving you clear feedback.
Smart Skipping: Quick Contraindications
A few straightforward rules will keep your routine glowing and safe. I keep these posted right above my mixing station.
- Avoid “photosensitizing” oils before sun exposure. Citrus oils like bergamot, lemon, lime, and grapefruit can make skin more sensitive to UV rays. Use them in your evening routine instead.
- Keep all oils away from your eyes. The immediate area around your eyes is very delicate. If you want to address the eye area, use a product specifically formulated for it.
- Know your skin’s state. If you have active, severe acne, broken skin, or a diagnosed condition like eczema, consult a dermatologist before adding new active ingredients.
This isn’t about fear, it’s about care. Working thoughtfully with these powerful plant allies lets you enjoy their benefits with complete confidence.
Rosehip Oil Vs. Your Other Cabinet Favorites
Think of your face oil collection like a wardrobe. You need different pieces for different moods and seasons. If rosehip oil is your versatile little black dress, the other oils are your favorite jeans, your breezy linen shirt, and your coziest sweater. Each one has a unique texture and a job it does best.
| Oil | Texture & Feel | Best For |
|---|---|---|
| Rosehip Seed Oil | Medium-weight, absorbs nicely, slight earthy scent. | Daily repair, fading marks, general anti-aging. |
| Jojoba Oil | Light liquid wax, non-greasy, skin-similar. | Balancing oil production, sensitive skin, a perfect mixer. |
| Grapeseed Oil | Very light, almost “dry,” barely-there feel. | Oily or acne-prone skin, summer humidity. |
| Sea Buckthorn Oil | Rich, intensely orange, can feel tacky. | Intense repair for very dry or damaged skin. |
| Lavender Carrier Oil | Light, mild, subtly nutty aroma. | Gentle all-over hydration, especially for calming routines. |
Jojoba Oil
Jojoba is actually a liquid wax ester, and its structure is remarkably close to our skin’s own sebum. This makes it a brilliant skin communicator, excellent for subtly telling oily skin to calm down or for giving dry skin a familiar boost. I reach for it when my skin feels out of balance. It’s the best mimic you can find. Its comedogenic potential varies by skin type and formulation. For oily or acne-prone skin, understanding its pore-clogging potential helps tailor use.
Grapeseed Oil
This oil feels like almost nothing on the skin. It’s thin and absorbs so quickly it leaves a matte, smooth finish. Grapeseed oil is my top pick for oily or combination skin, especially in sticky weather. If you’re new to face oils and fear greasiness, start here. Remember those gentle pressing techniques from our guide on how to apply grapeseed oil on face-they work perfectly with this one.
Sea Buckthorn Oil
Sea buckthorn is the powerhouse. Its deep orange-red color comes from intense concentrations of carotenoids. This oil is a repair specialist for parched skin, sun stress, or pronounced dryness, but it can temporarily stain skin and fabrics. I use it as a targeted treatment, often mixing just a few drops into another oil to dilute its potency and color.
Lavender Carrier Oil (vs. Essential Oil)
This is a key distinction. Lavender carrier oil (like from the seeds) is a mild, fixed oil used to dilute essentials. Lavender essential oil is the highly concentrated steam-distilled essence. For face application, you always dilute the potent essential oil in a carrier—never apply it directly. It’s crucial to understand how to mix and blend essential oils properly. When we talk about safe methods for how to apply lavender oil to face, we always mean the properly diluted essential oil, typically just 1-2 drops in a teaspoon of carrier.
Simple DIY Face Oil Blends from My Apothecary
Making your own face oil is a satisfying weekend project. You control the ingredients and the scent. Always mix small batches, store them in dark glass bottles away from heat and light, and do a patch test on your inner arm before using any new blend, especially with essential oils. Here are two of my most-reached-for recipes.
Glow-Getter Blend for Dull Skin
This blend is brightening and lightweight. Carrot seed essential oil is fantastic for revitalizing tired-looking skin, but it must be diluted.
- 1 teaspoon rosehip seed oil
- 1 teaspoon grapeseed oil
- 1 drop of carrot seed essential oil
Combine all oils in a 10ml dark glass dropper bottle. Gently roll the bottle between your palms to mix. Apply 3-4 drops to cleansed skin in the evening, as carrot seed oil can make skin more sun-sensitive. This blend has a warm, earthy, slightly sweet aroma.
Calming Blend for Reactive Skin
When my skin is red or irritated from wind or stress, this is my go-to. Jojoba provides a neutral base, rosehip offers repair, and lavender soothes.
- 2 teaspoons jojoba oil
- 1 teaspoon rosehip seed oil
- 2 drops of lavender essential oil
Add the carrier oils to your dark glass bottle first, then add the lavender essential oil. Cap and swirl to blend. This 1% dilution of lavender essential oil is safe and effective for facial use, but a patch test is non-negotiable. Use 4-5 drops on damp skin morning or night. The scent alone is deeply relaxing.
Simple DIY Face Oil Blends from My Apothecary
Mixing your own face oil is a perfect weekend project. It is quiet, creative, and gives you total control over what touches your skin.
I keep a few small amber bottles and droppers on my crafting shelf for this. Starting with simple blends for common skin goals builds confidence before you experiment.
Always work with clean, dry hands and utensils. These recipes make a small batch, enough to last a couple of weeks so it stays fresh.
Glow-Getter Blend for Dull Skin
This is my go-to when my complexion looks tired and lacks radiance. Rosehip brings renewal, grapeseed is a light canvas, and carrot seed is like a tiny drop of sunshine.
You will need a 1/2 ounce (15 ml) dark glass bottle with a dropper. Here is how to make it.
- 1 teaspoon rosehip seed oil
- 1 teaspoon grapeseed oil
- 1 drop carrot seed essential oil
Pour the rosehip and grapeseed oils directly into your bottle. Now, add that single drop of carrot seed oil.
Carrot seed oil is photosensitizing, so only use this blend at night. It has a warm, earthy scent that I find very grounding.
Cap the bottle and roll it gently between your palms to mix. Store it away from direct light and heat. Apply 3-4 drops to your face and neck after cleansing in the evening.
Calming Blend for Reactive Skin
When my skin feels warm or looks flushed, I reach for these gentle ingredients. Jojoba mimics our skin’s own oils, rosehip soothes, and lavender is a classic for calming irritation.
This recipe uses an essential oil, so we must dilute it properly. For facial skin, I keep the dilution around 1%.
- 2 teaspoons jojoba oil
- 1 teaspoon rosehip seed oil
- 2 drops lavender essential oil (Lavandula angustifolia)
Two teaspoons of jojoba plus one teaspoon of rosehip gives us three teaspoons total of carrier oil. Two drops of lavender in this amount is a safe, effective dilution for most people.
Combine all the oils in a 1/2 ounce dark glass bottle and swirl to blend. Before using any blend with essential oils, do a patch test on your inner arm. Wait 24 hours to check for any reaction, and make sure to use the proper dilution ratios.
If all is well, use 2-3 drops as the final step in your routine, morning or night. The scent is softly floral and incredibly relaxing.
Your Questions, Answered
Can I use rosehip oil if I have oily or acne-prone skin?
Absolutely. Lightweight, non-comedogenic oils like rosehip can actually help balance oil production by providing good, nourishing fats. Start with just 2-3 drops on damp skin to see how your skin responds without feeling greasy.
Do I apply my face oil before or after my moisturizer?
You have a choice. For the best seal, apply oil after your serums and let it absorb, then layer moisturizer on top. For a deeply nourishing treatment, mix one drop of oil directly into your moisturizer in your palm before applying.
My rosehip oil has a strong color and smell. Is it still good?
Pure, unrefined rosehip oil has a natural golden-orange hue and a mild, earthy scent-this is normal. However, a sharply rancid or bitter smell means the oil has oxidized and it’s time to replace your bottle.
How do I adapt my rosehip oil routine for different seasons?
In humid summers, use fewer drops or mix it with a lighter oil like jojoba. In dry winters, you can use the full amount and seal it with a richer cream to combat moisture loss from indoor heating.
Is it safe to use rosehip oil with my retinol serum?
Yes, it’s a wonderful pairing. Apply your retinol treatment first, wait for it to absorb, then follow with rosehip oil. The oil helps soothe skin and mitigate potential dryness from the retinoid.
Your Skin’s Botanical Companion
The most reliable advice from my apothecary shelf is to start simple and be consistent. Your skin thrives on gentle, regular care much more than on complicated, ever-changing routines.
I share many more personal routines and tips right here on Botanical Oils. Trust your own experience as much as my guidance when weaving these oils into your life for body, skin, hair, and home.
References & External Links
- Rosehip Oil: Benefits, Use, and More
- Why You Should Add Rosehip Oil to Your Skincare Routine, According to Experts
- Rose Hip Oil: Uses and Benefits
- Rosehip Oil: Health Benefits, Safety Information, Dosage, and More
Noemi Kamińska
Noemi is an accomplished wellness researcher, nutrition care guide and body care expert. She has years of experience in formulating various oil combinations for full body wellness including face, hair, body care, essential oils and cooking oils. She works as a bio-formulator working with oil chemistry and analyzing the best formulations when it comes to your needs. Feel free to reach out to get your oil needs sorted.