
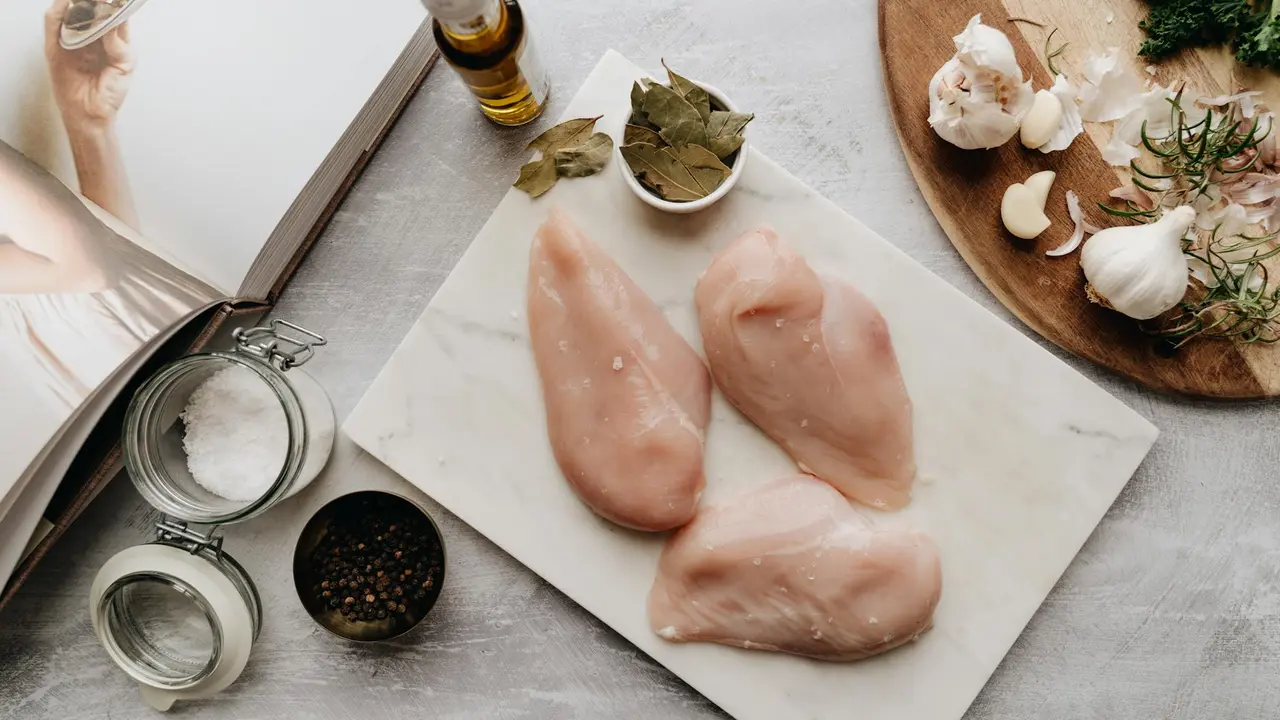
What’s the Right Oil Temperature for Frying Chicken and How Do You Test It?
If your fried foods often come out greasy or burnt, I’ve been there too in my own kitchen. Nailing the oil’s heat transforms frying from a guessing game into a reliable way to get crispy, golden results.
This guide will give you the confidence to fry by explaining the why and how of oil temperature.
- Why precise heat matters for texture and safety
- Ideal temperature ranges for chicken, fries, and more
- How to test oil with or without a thermometer
- My go-to methods for keeping the temperature steady
Why Your Oil’s Heat is the Heart of Good Frying
Getting the oil temperature right is the single most important step for a perfect fry.
Too cool, and your food soaks up the oil like a sponge. You end up with a pale, soggy, and greasy mess.
Too hot, and the outside burns before the inside cooks. It creates a bitter taste and harmful compounds.
The ideal temperature instantly seals the food’s surface, creating a crisp barrier that locks in juices and keeps excess oil out.
There’s a little science to respect here. Oil expands as it heats, so never fill your pan more than halfway. This simple safety step prevents dangerous spills and burns.
This isn’t just about texture, it’s about a lighter, more wholesome meal. Properly heated oil stays on the surface, so your food absorbs less of it.
You get all the satisfying crunch with a cleaner, less heavy finish.
Your Quick-Reference Frying Oil Temperature Chart
Think of oil temperatures like the notes in a blend of essential oils. Each food has its own perfect “sizzle point” for harmony.
| Food | Ideal Temperature |
| Chicken (pieces, tenders) | 350°F – 375°F (175°C – 190°C) |
| French Fries, Potato Wedges | 325°F – 350°F (160°C – 175°C) |
| Fish Fillets, Shrimp | 365°F – 375°F (185°C – 190°C) |
| Doughnuts, Fritters | 365°F – 375°F (185°C – 190°C) |
| Vegetable Tempura | 340°F – 360°F (170°C – 180°C) |
Sticking to these ranges gives you the control to move from guesswork to consistent, golden results.
The Perfect Fry for Chicken: Crispy Outside, Juicy Inside
For chicken, the sweet spot is 350°F to 375°F (175°C to 190°C). I aim for the middle, around 365°F, in my own kitchen.
This range is hot enough to quickly form a golden, crunchy crust. It simultaneously seals in the natural juices so the meat stays tender.
You can see and hear when the oil is ready. It will shimmer and move like liquid silk across the pan.
When you carefully add a breaded piece, it should sink slightly then immediately rise, surrounded by a lively, steady bubble.
If the oil bubbles violently and spatters, it’s too hot. If the chicken just sits there with lazy bubbles, it’s not hot enough.
Trust your senses. They are your most reliable kitchen tools, just like when you’re blending oils by scent and feel.
How Do You Know When Oil is Ready to Fry? (The No-Tools Tests)
You don’t always need a thermometer. Just like I judge a new batch of jojoba by its golden color and nutty scent, you can learn to read your frying oil. These classic kitchen tricks are about trusting your eyes and ears.
Your goal is to see active, energetic heat without any smoke, which signals the oil is breaking down. These tests help you find that sweet spot. Understanding what happens when oil breaks down can improve your cooking results.
The Bread Cube Test: Your Visual Timer
This is my go-to method. It gives you a clear, timed signal. Grab a 1-inch cube of plain white bread. The inside of a dinner roll works perfectly.
- Heat your stable oil, like avocado or high-oleic sunflower, in a heavy pot over medium heat for a few minutes.
- Carefully drop the bread cube into the center of the pot.
- Start counting. Watch it closely.
If the cube turns a golden-brown color in 60 seconds, your oil is right around 350°F to 365°F, perfect for most frying. If it browns much faster, your oil is too hot. Let it cool a bit. If it takes well over a minute, give the oil more time to heat.
You’ll see tiny bubbles actively dancing around the bread. That’s the moisture inside meeting the hot oil. It’s a good, lively sign.
The Wooden Spoon Test: Listening for the Fizz
This test is about sound. I reach for a wooden chopstick or the handle of a wooden spoon from my drawer. Metal won’t work for this.
- Heat your oil as before.
- Dip the end of the wooden utensil into the oil, touching the bottom of the pot.
- Listen and look right where the wood meets the oil.
A steady stream of tiny, enthusiastic bubbles should immediately rise and fizzle around the wood. That’s the moisture in the wood reacting to the right level of heat.
If the bubbles are super aggressive and large, the oil is too hot. If you only get a few lazy bubbles, it needs more time. You’re listening for a happy, consistent sizzle. It’s not unlike testing a batch of herbal oil infusion by its aroma-you learn the signature of “ready.”
Practice these tests with care, never leaving heating oil unattended. Soon, checking your oil will feel as instinctive as rubbing a drop of carrier oil between your fingers to feel its texture.
Using the Right Tools: Thermometers and Gauges for Confidence
In my work with botanical oils, precision matters. Too much heat damages delicate compounds. The same is true for cooking oils.
Guessing the temperature is like eyeballing a dilution for sensitive skin. It often goes wrong. A dedicated thermometer gives you control and protects your oil.
A good frying thermometer removes the guesswork and helps you achieve that perfect, crispy-but-not-greasy result every time.
Choosing Your Tool: Instant-Read vs. Candy/Deep-Fry Thermometers
Think of these like the different tools in my apothecary. Each has a best use.
A candy or deep-fry thermometer clips to the side of your pot. You leave it in the oil to monitor the temperature constantly. It’s my go-to for frying.
This type acts like a steady monitor, letting you see the temperature dip when you add food and adjust your heat accordingly.
An instant-read thermometer is for a quick check. You dip it in, get a reading in seconds, and pull it out. It’s versatile but not for continuous monitoring.
Both are valuable. For frying, the clip-on style builds more confidence.
Using Your Thermometer Safely and Effectively
Safety first, just as when handling any potent substance. Never let the thermometer tip touch the bottom of the pot.
It will read the scorching metal, not the oil’s true temperature. Suspend it in the oil.
Give it a minute to stabilize after the oil heats up. A steady reading is your guide.
Always handle the stem with a dry cloth, as the metal gets dangerously hot. Keep it upright so the temperature sensor stays fully immersed.
What Makes a Reliable Thermometer?
You don’t need a fancy brand, just a trustworthy tool. Look for a clear, easy-to-read dial or digital display.
A good range is key. Your thermometer should easily cover from 300°F to 400°F. I prefer one with a clip and a protective sleeve for the stem.
Some have helpful labels for different foods, like “chicken” or “doughnuts.” These are nice guides, but trust the specific temperature numbers above all.
Your FAQ: Food Thermometer vs. Frying Thermometer
This is a common point of confusion. They are designed for different jobs.
A food thermometer (like a meat thermometer) tells you the internal temperature of your chicken to ensure it’s cooked through. You check it at the end.
A frying thermometer tells you the temperature of the oil environment, which is what cooks the outside of your food. You monitor it throughout the process.
While some instant-read probes can do both, a dedicated frying thermometer that clips to the pot is the specialist tool for the job. It’s the difference between a general carrier oil and a specific essential oil blend. Each excels in its own realm.
If you don’t have a thermometer, you can test with a cube of bread. It should brown nicely in about 60 seconds at 350°F. But this is an estimate. For true consistency, a tool on your shelf is the best investment.
Keeping Your Temperature Steady in the Dance of Frying
Adding food to hot oil is like inviting a cool friend into a warm bath-the temperature will drop. Your job is to manage that dip with grace.
A good digital thermometer is your most honest partner here, giving you the real-time truth about your oil’s state. Watch it closely the moment your chicken or vegetables hit the oil.
Give Your Food Room to Breathe
Overcrowding is the quickest way to a greasy, soggy result. Too much food at once pulls too much heat from the oil, and it can’t recover fast enough to seal the food’s surface.
I fry in small, manageable batches, never filling more than a third of the pot or pan. This keeps the oil’s temperature more stable. Frying in small batches is not a suggestion for perfect results-it’s the rule. It gives each piece the energetic, bubbly embrace it needs.
Listen to the Sizzle and Watch the Bubble
When you add food, turn your burner up slightly to compensate for the incoming cool. You’re anticipating the drop. Don’t crank it to high, just nudge it.
Then, watch the oil’s behavior. At the right temperature, it will surround the food with a lively, steady bubble. That constant, active sizzle tells you the heat transfer is working correctly, pushing moisture out and keeping oil from soaking in. If the bubbling is frantic and the oil smokes, it’s too hot. If it’s lazy and slow, the oil is too cool.
A Quick Guide to the Dance Steps:
- Heat oil to your target temp (say, 350°F for chicken).
- Add a single piece first as a test. The temp will fall.
- Adjust the burner up a touch to counter the drop.
- Add your first small batch. The sizzle should be vigorous but not violent.
- Let the oil climb back to near your target temp before adding the next batch.
On Reusing Your Frying Oil
You can often reuse oil, but its chemistry changes. Each heating session breaks down the oil’s structure a little, lowering its smoke point for next time.
I keep a dedicated “frying only” bottle of a neutral, high-heat oil like avocado or high-oleic sunflower in my kitchen. Always strain cooled oil through a fine mesh sieve or cheesecloth to remove food particles, which burn and degrade the oil faster. Store it in a dark, cool place. For clean reuse at home, I label the bottle with the date and track uses. This helps keep the oil safe and flavorful.
Discard oil if it smells acrid, looks overly dark, foams excessively when heated, or smokes at a temperature far below its original smoke point. In my home, well-cared-for frying oil gets 2-3 uses before it’s retired to the compost bin (if plant-based) or disposed of properly.
Choosing a Botanical Oil That Loves the Heat
When you’re cooking with heat, you need an oil that holds its composure.
An oil’s smoke point is the temperature where it starts to break down, smoke, and develop bitter flavors and harmful compounds. For safe, delicious frying, you need a botanical oil with a high smoke point that remains stable under pressure, much like a robust base note in a complex aromatic blend. It’s the foundation that supports everything else. To further understand, consult a scientific guide on smoke points that shows how to choose oils for different cooking methods.
The High-Heat Champions
My personal favorites for the frying pan are avocado oil and refined coconut oil. They’re my reliable kitchen staples. I especially like refined avocado oil because it has a higher smoke point, making it perfect for cooking at high temperatures.
Avocado oil, pressed from the fleshy fruit, has a wonderfully high smoke point around 520°F. It’s mild, buttery, and performs beautifully. That makes avocado oil ideal for high-heat cooking, frying, and searing with its stable smoke point. It also brings heart-healthy monounsaturated fats, supporting its best uses from sautéing to finishing dishes. Refined coconut oil, derived from the dried kernel (copra) of the coconut, is another winner with a smoke point near 450°F.
It gives a subtle, clean sweetness without overpowering your food.
| Oil | Approx. Smoke Point | Plant Origin Note |
|---|---|---|
| Avocado Oil | 520°F / 270°C | Pressed from the fruit’s flesh, like olive oil. |
| Refined Coconut Oil | 450°F / 230°C | From dried coconut kernel; neutral scent. |
| High-Oleic Sunflower Oil | 450°F / 230°C | Bred for stability; high in monounsaturated fat. |
Can You Deep Fry With Olive Oil?
This question lands in my inbox all the time. The answer is nuanced, just like the oil itself.
Extra virgin olive oil, that fragrant, green-gold nectar, has a lower smoke point (around 375°F to 405°F). I treasure it for dressings and low-heat cooking. Using exquisite extra virgin olive oil for deep-frying is like using a rare, top-note essential oil in a heavy-duty cleaner—it’s a waste of its delicate, complex character, especially when you can find oils better suited for high-heat cooking.
Refined or “light” olive oil, however, is a different story. Through filtration, it achieves a higher smoke point, often above 465°F. It’s a viable, more neutral-tasting option for frying. For my home kitchen, I save the precious extra virgin for finishing and choose a dedicated high-heat oil for the fryer.
When to Seek Professional Help: Respecting Heat and Fire

Getting your oil temperature right is a skill. Knowing what to do when things go wrong is a responsibility. I treat a pot of hot frying oil with the same respect I give a bottle of undiluted cinnamon bark essential oil. Both are potent. Both demand clear-headed care.
If Your Oil Smokes or Catches Fire
See a steady stream of smoke? That’s your oil breaking down, fast. Turn off the heat source immediately and carefully move the pot to a cold burner if you can do so safely.
If flames appear, do not panic. And never, ever throw water on a grease fire. Water will cause the burning oil to splatter violently.
Your goal is to smother the fire by cutting off its oxygen. Here is what you do, in order:
- Turn off the heat source.
- Slide a metal lid or a large, flat cookie sheet over the pot to smother it.
- If a lid isn’t within reach, carefully pour a generous amount of baking soda over the base of the flames.
- Leave the cover on until the pot has cooled completely, hours later.
I keep a large box of baking soda and a dedicated pot lid right next to my stove, just like I keep carrier oils next to my essential oils for safe dilution.
Disposing of Used Frying Oil
Please do not pour it down your drain. It will solidify and clog your pipes, creating a mess for you and the local waterways. Cooled oil belongs in the trash, not the water system.
Let the oil cool completely in the pot. Then, transfer it into a non-recyclable container with a secure lid, like an old milk jug or a takeout soup container. Seal it shut and place it in your regular trash. For properly disposing of used cooking oil, linseed oil, and fats at home, see our disposal guide. It covers safe, eco-friendly options and local rules.
Proper disposal is the final, respectful step in working with any oil, whether it’s for your skin or your skillet.
Knowing When to Call a Professional
Trust your instincts. If a grease fire grows beyond a small, contained pot and you cannot smother it instantly, get out. Close the door behind you to contain the fire, call 911 from outside, and let the professionals handle it.
The same goes for your kitchen’s ventilation. If you are unsure whether your stove hood vents outside or simply recirculates air, a quick consultation with a contractor can make your frying sessions safer and your kitchen air cleaner.
Asking for expert help is not a failure. It is the wisest choice a knowledgeable home practitioner can make.
Friendly Answers to Your Frying Questions
Why is the frying temperature different for French fries and chicken?
Different foods have different densities and moisture contents. French fries benefit from a slightly lower temperature (325°F-350°F / 160°C-175°C) to cook the interior fully before the outside gets too dark, while chicken needs a higher heat (350°F-375°F / 175°C-190°C) to instantly seal its juicy interior behind a crisp crust.
Should I use a thermometer or the manual bread test?
For absolute consistency, a thermometer is your best tool. The bread cube or wooden spoon tests are excellent, practical backups for when you’re without one, helping you read the oil’s visual and auditory cues like an expert.
What should I look for in a frying thermometer on Amazon?
Seek a clip-on candy/deep-fry style with a clear, readable face that covers at least 300°F to 400°F. Read reviews to confirm its accuracy and responsiveness, as a reliable tool builds confidence just like a pure, trusted botanical oil.
Can I safely reuse my frying oil?
Yes, if you care for it properly. Always strain cooled oil through a fine sieve to remove particles, and store it in a dark, cool place. Discard it if it darkens, foams, or smells acrid, as a degraded oil won’t perform well or support your wellness.
What’s the best way to dispose of used botanical frying oil?
Never pour it down the drain. Let the oil cool completely, then seal it in a non-recyclable container and place it in the trash. For plant-based oils, check if your local composting program accepts them as a final, earth-friendly step. You can find more detailed tips on proper disposal and reuse of leftover frying oil at home.
Nurturing Your Fry with Botanical Care
Gently heating your oil and testing it with a thermometer or a bread cube is the single most reliable way to protect its integrity and achieve perfect results. This mindful practice honors the oil’s nature, giving you food that is crisp outside, tender inside, and supportive of your wellness.
I offer these lessons from my own apothecary and kitchen shelf to enrich your daily rituals. Trust this knowledge and your own senses as you continue to work with botanical oils for body, skin, hair, and home.
Further Reading & Sources
- r/AskCulinary on Reddit: Just got a deep fryer – what temperature to cook fried chicken?
- What Temperature to Fry Chicken? | ThermoWorks
- Perfectly Crispy Fried Chicken | The Modern Proper
- I Made Hundreds of Fried Chicken Batches as a Line Cook-Here’s the #1 Way to Keep it Crispy and Juicy
Noemi Kamińska
Noemi is an accomplished wellness researcher, nutrition care guide and body care expert. She has years of experience in formulating various oil combinations for full body wellness including face, hair, body care, essential oils and cooking oils. She works as a bio-formulator working with oil chemistry and analyzing the best formulations when it comes to your needs. Feel free to reach out to get your oil needs sorted.