What Are the Best Methods and Recipes for Making Herbal Infused Oils at Home?
Feeling unsure about how to start turning your herbs into useful oils is completely normal. From my own shelf, I can tell you that creating infused oils is a gentle, rewarding craft that builds confidence with each small batch.
This guide will show you how to choose the right method for your herbs and goals, ensuring safe, potent results every time. We’ll walk through:
- Selecting the best herbs and carrier oils for infusion
- Step-by-step instructions for both cold and warm infusion methods
- My favorite simple recipes to try first
- Tips for storing your oils to keep them fresh and effective
The Three Core Methods: Solar, Slow Heat, and Quick Heat
Each infusion method has its own rhythm. I keep jars for all three going in my apothecary, depending on the season and the herb.
1. The Solar (Sun) Method
This is the classic, patient way. You place your jar of oil and herbs in a warm, sunny spot for 4 to 6 weeks.
This gentle warmth slowly coaxes the herbs’ properties into the oil, much like sun tea steeping on a porch. It’s perfect for delicate flowers like calendula or chamomile.
I use a sunny windowsill that gets afternoon light. Give the jar a gentle shake every day or two. You will watch the oil slowly change color, becoming a deeper gold or green.
2. The Slow Heat Method
This is my go-to for roots, barks, or when I want an infusion in a few days, not weeks. A crock-pot or double boiler provides low, consistent warmth.
Using indirect, low heat for several hours mimics a long solar infusion but in a controlled, faster way. It’s brilliant for sturdy herbs like plantain or rosemary.
I set my small crock-pot to the “warm” setting, never “low” or “high.” The oil should feel barely warm to the touch, never hot. I let it infuse for 2 to 3 days, switching it off at night.
3. The Quick Heat (Stovetop) Method
This is a fast infusion done in a matter of hours on the stovestop using a double boiler.
Use this method only for very dry, robust herbs and when you need a finished oil quickly for a recipe. The higher heat can damage delicate compounds, so I reserve it for things like whole spices.
Keep the water in the bottom pot at a gentle simmer, not a rolling boil. Stir the oil and herbs occasionally. After 2 to 4 hours, the oil will be fragrant and ready to strain.
Preparing Your Herbs: The Golden Rule of Dryness
This is the one step you cannot rush or skip. Any water left on your herbs will introduce moisture into the oil.
That trapped water creates the perfect environment for mold and bacteria, ruining your entire batch. I have learned this the hard way with a jar of beautiful, spoiled lemon balm.
For homegrown or foraged herbs, drying is non-negotiable. Bundle stems and hang them upside down in a dark, warm place with good airflow. You can also use a food dehydrator on its lowest setting.
Herbs are ready when leaves crumble easily between your fingers. For store-bought herbs, ensure they are labeled for culinary or tea use, which means they are dried and safe.
Choosing Your Carrier Oil: A Simple Guide
The oil you choose is the base that carries the herb’s goodness. It also adds its own properties to your final blend.
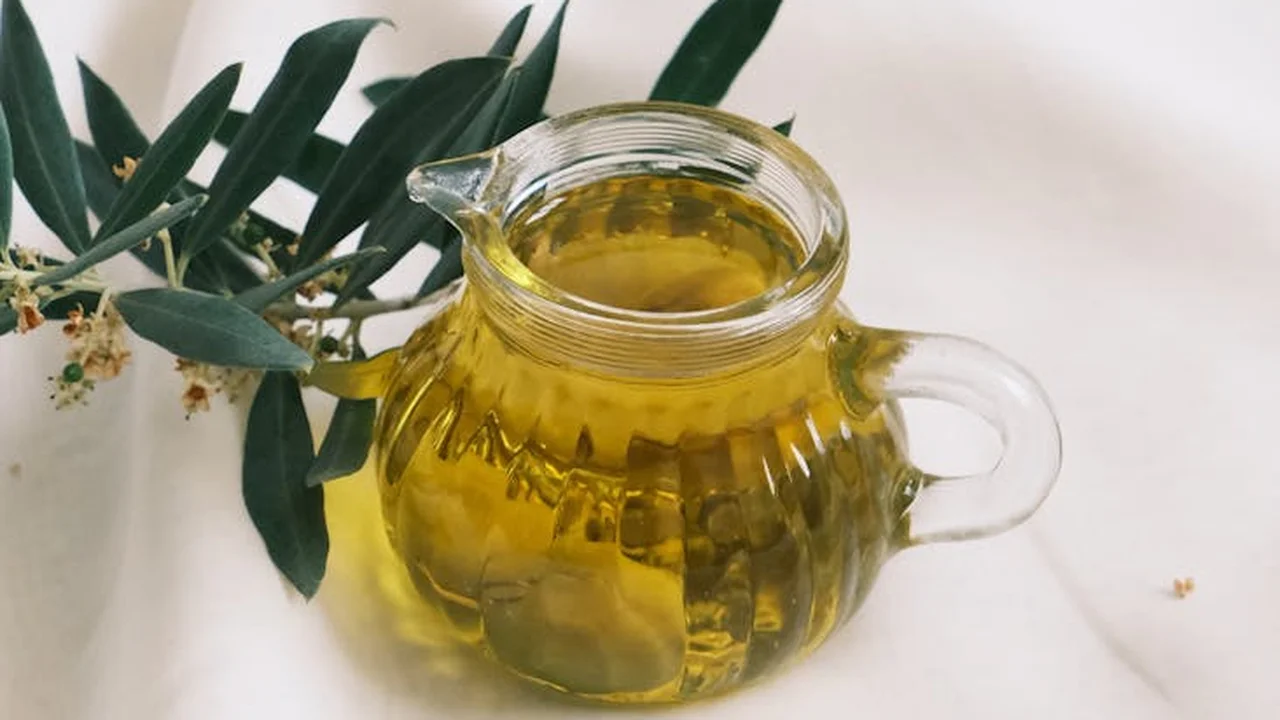
Olive oil and fractionated coconut oil are my top picks for beginners because they are stable, accessible, and versatile. But the best choice truly depends on your skin and what you are making.
I keep a selection on my shelf. Here is how I think about them:
| Oil | Best For | Texture & Note |
|---|---|---|
| Olive Oil | All-purpose, robust salves, body oils for dry skin. | Rich, slightly green scent, heavier feel. |
| Fractionated Coconut Oil | Face oils, hair serums, anything where you want no scent and a dry feel. | Odorless, light, and never solidifies. |
| Sweet Almond Oil | Massage oils, baby oil blends, sensitive skin. | Lightly nutty, soft, and absorbs well. |
| Jojoba Oil | Face serums, scalp treatments, oily or acne-prone skin. | Actually a liquid wax, mimics skin’s sebum, very stable. |
| Sunflower Oil | Light body oils, economical large batches. | Nearly odorless, light texture, budget-friendly. |
Start with what you have. A simple olive oil infused with calendula from your garden makes a profoundly healing skin oil. That is where the real magic begins.
The Quiet Benefits of Herbal Infused Oils
When you make an infused oil, you are pulling the gentle, soluble virtues of a plant into a nourishing base. The benefit comes from this partnership.
The herb offers its specific gifts, and the carrier oil-like olive, jojoba, or sweet almond-brings its own softening, moisturizing properties to the mix. A quick comparison of jojoba, almond, and coconut oils can guide how you dilute essential oils, tailoring absorption and skin feel. These carriers vary in texture and skin compatibility, helping you choose the right balance for your blend.
For Your Skin
Think of a calendula-infused oil for a rough patch or a minor scrape. The petals turn the oil a deep, sunny gold, and the result is supremely soothing.
Calendula oil is my first reach for calming irritated skin, especially on little ones.
A rosemary-infused oil, with its crisp, pine-like scent, can feel wonderfully toning and refreshing in a body oil blend.
For Your Hair
Fenugreek seeds, once infused, create an oil that many find helps with hair strength and a pleasant shine.
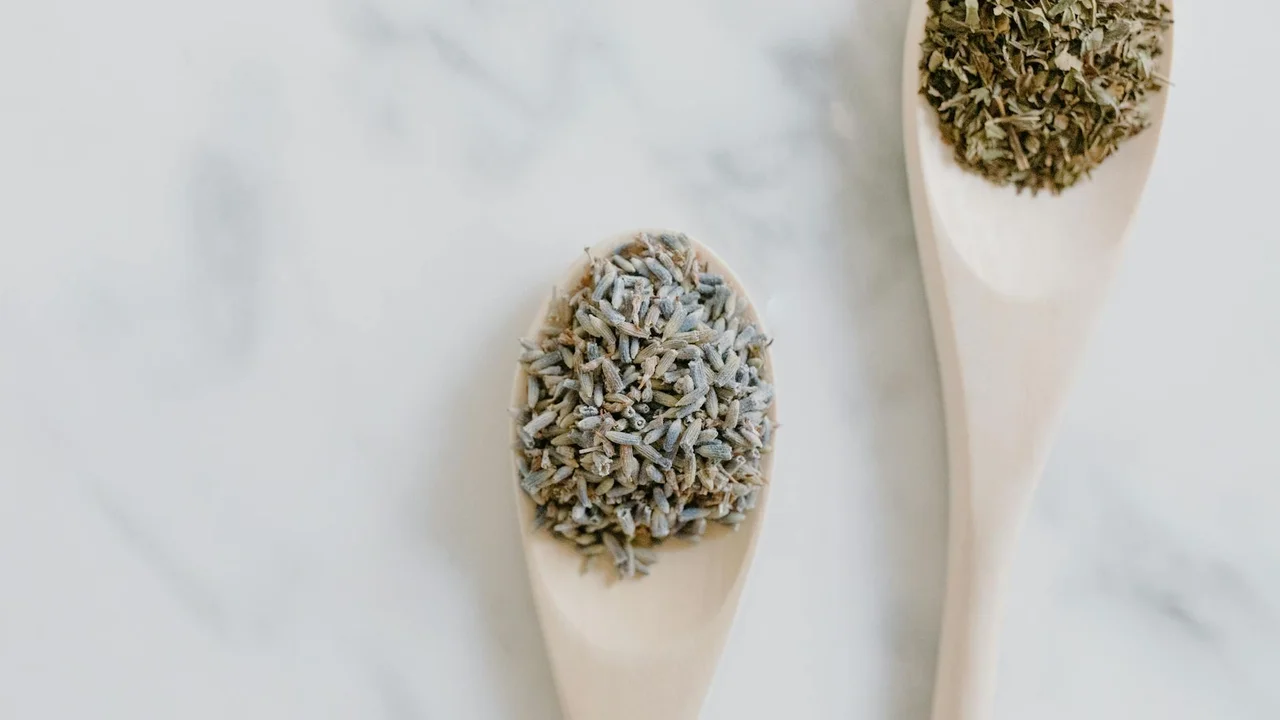
I love a weekly scalp massage with a lavender-infused oil. Its light floral scent is calming, and the ritual itself feels like a reset. Lavender is one of the best oils for massage therapy.
Massaging any herbal oil into your scalp nourishes the skin and roots, which is where healthy hair begins.
For Your Home
Infused oils aren’t just for personal care. A lemon balm or thyme-infused oil makes a beautiful base for a herbal dusting polish.
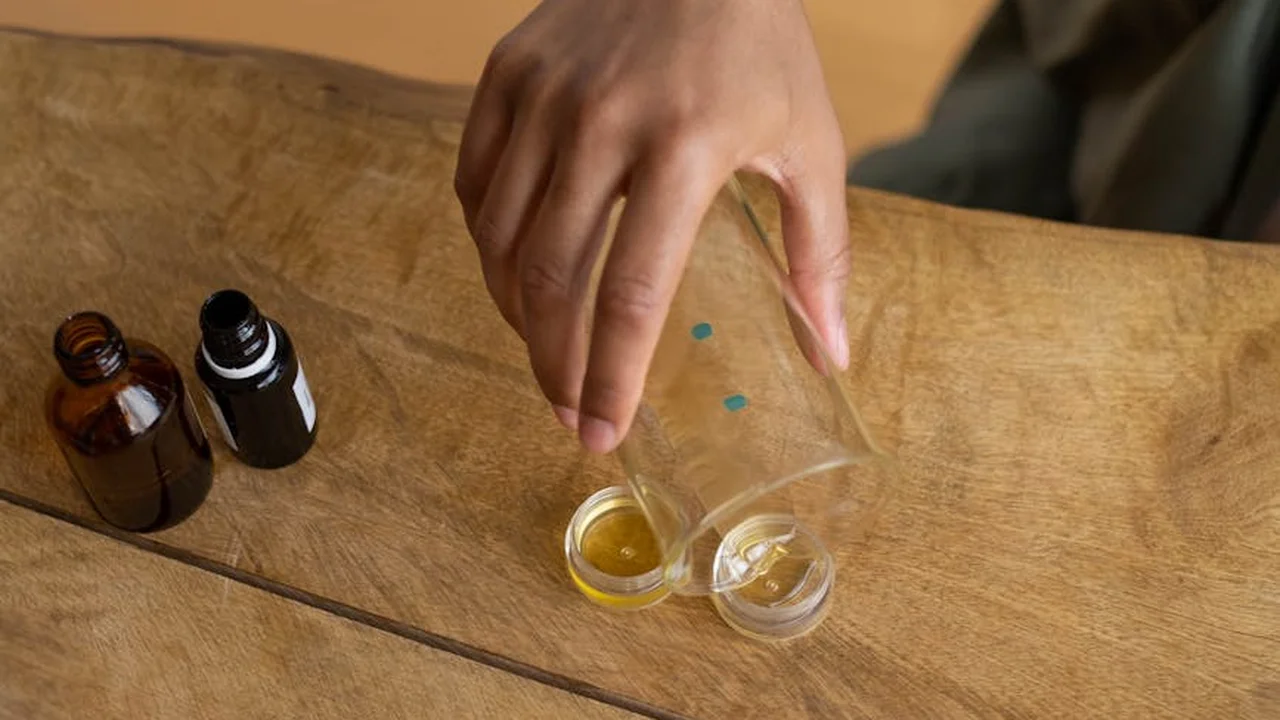
Just mix a few spoonfuls with some beeswax for a soft balm that cleans and scents wood surfaces. You can also create a simple linen spritz by combining your infused oil with water and a little vodka in a spray bottle.
The fresh, green scent of herbs in your home tasks turns chores into moments of quiet pleasure.
How Do You Infuse Oil? A Look at the Top Three Methods
The core process is always the same: you combine dried plant material with a carrier oil, apply gentle heat or time, and then strain it. The method you choose changes the time and the character of your final oil.
Always start with bone-dry herbs and perfectly clean, dry jars to prevent mold from any water content. For a standard jar, you’ll want to fill it about 1/3 to 1/2 full with herbs, then pour in your oil to cover them by at least an inch.
The Slow, Sunny Method (Solar Infusion)
This is the classic, patient way to infuse oil, and it’s perfect for delicate flowers and leaves. It answers the question of how to infuse olive oil with sunshine.
- Place your dried herbs in a clean glass jar.
- Cover them completely with your chosen oil.
- Seal the jar tightly and place it on a sunny windowsill.
- Let it sit for 4 to 6 weeks, giving it a gentle shake every day or two.
- Strain the oil through a fine mesh strainer or cheesecloth into a clean bottle.
This method is best for light-loving herbs like lavender, chamomile, and calendula. I always have a jar of solar-infused chamomile oil brewing on my kitchen sill. It’s a slow, steady process that yields a very gentle oil.
The Gentle, Warm Method (Slow Heat)
If you want an infusion faster than solar but with minimal risk, this is your method. The crock-pot is a perfect tool here.
Using a slow, indirect heat like a water bath is the safest way to speed up the infusion without damaging the oil’s nutrients.
- Combine herbs and oil in a heat-proof jar (like a mason jar).
- Place the jar, uncovered, in your crock-pot. Fill the crock-pot with water until it reaches the same level as the oil inside the jar.
- Set the crock-pot to the lowest “warm” setting. You want the water just warm to the touch, not hot.
- Let it infuse for 3 to 8 hours, checking the water level occasionally.
- Remove the jar, let it cool, then strain the oil.
This method is excellent for tougher plant parts like roots, barks, or seeds. Making a warming ginger-infused oil this way takes an afternoon, not a month.
The Fast, Direct Method (Quick Heat)
This is the traditional stovetop method for creating culinary infused oils, like a rosemary garlic olive oil.
This method has the highest risk of burning, which makes your oil bitter and ruins it, so your lowest stove setting is non-negotiable.
- Combine herbs and oil in a heavy-bottomed saucepan or double boiler.
- Heat on the absolute lowest setting your stove allows. You should see tiny bubbles at most, never a simmer.
- Warm it gently for 1 to 2 hours, watching it closely and never leaving it unattended.
- Let the oil cool completely before straining.
It’s fast, but it requires vigilance. I use this only for oils I plan to use quickly in cooking, as the heat can reduce shelf life a bit.
Choosing Your Foundation: Which Oil is Best for Infusion?
I get asked all the time which oil to use. The answer depends on what you’re making it for. Think of your carrier oil as a blank canvas. You want one that feels good to you.
For a robust, classic oil that soaks in slowly, choose olive oil. It’s like a sturdy wooden spoon in your kitchen. I use it for body oils and salves that need staying power. Not all olive oils are created equal, so be sure to pick a quality one for your homemade blends.
If you want something solid at room temperature that’s fantastic for skin, coconut oil is a winner. It melts on contact and leaves a protective layer. Just know it can feel heavy for some faces.
Jojoba oil is my top pick for facial blends because it mimics our skin’s own sebum. It’s light, absorbs quickly, and won’t clog pores—making it suitable for various skin types. It feels like a satin sheet for your skin.
Sweet almond oil is a gentle, all-purpose choice that works for almost everything. It’s lightly moisturizing and has a subtle, nutty scent. It’s very forgiving for beginners when compared to other almond and essential oils used for facial skincare.
My rule of thumb is simple. Use an oil you’d happily smooth on your skin all by itself. For the face, jojoba or sweet almond are often your best friends.
Simple Recipes to Fill Your First Jar
These are my foundational recipes. Once you get the hang of these, you can swap herbs and oils to create your own favorites.
Soothing Calendula Oil for Skin
This is the first oil I ever made. Calendula petals are gentle champions for irritated or dry skin.
You will need:
- 1 cup of dried calendula petals
- 1 ½ cups of olive oil or jojoba oil
- A clean, dry glass jar
Pack the petals loosely into the jar. Pour your oil over them, making sure all plant material is submerged. Leave about an inch of space at the top.
For the solar method, seal the jar and place it on a sunny windowsill for 4-6 weeks, giving it a gentle shake every few days. For a faster result, use the slow heat method. Place your sealed jar in a small saucepan with a few inches of water. Keep the heat on the lowest setting for 3-5 hours, checking the water level so it doesn’t boil dry.
Strain the oil through a cheesecloth into a clean bottle. I use this for dry patches, as a base for diaper balm, or as a gentle after-sun treatment.
How to Infuse Coconut Oil with Lavender
This directly answers how to infuse coconut oil with a flower. The process is a little different because coconut oil is solid.
You will need:
- 1 cup of dried lavender buds
- 1 ½ cups of solid, unrefined coconut oil
Use the double-boiler method here. Create one by placing a heat-safe bowl over a pot of simmering water. The bottom of the bowl should not touch the water.
Add the coconut oil to the bowl. It will melt into a clear liquid. Stir in the dried lavender buds.
Let this mixture warm over very low heat for 2-3 hours, stirring occasionally. Keep the heat low. You want it warm, not hot. After it infuses, remove the bowl from the heat and let it cool slightly.
Strain the oil through a cheesecloth into a jar. It will solidify again as it cools, trapping the lovely scent of lavender inside.
This makes a wonderful bedtime cuticle balm. I also use a tiny scoop as a light summer body moisturizer or melt a bit into the ends of my hair as a mask.
Invigorating Rosemary Oil for Hair & Scalp
Rosemary has a reputation for supporting a healthy scalp. The needles are tough, so we use a little heat to help them let go of their goodness.
You will need:
- ½ cup of dried rosemary needles (crushed slightly in your hand)
- 1 cup of jojoba or sweet almond oil
Combine the rosemary and oil in your glass jar. For this herb, I recommend the slow heat method to ensure a strong infusion.
Seal the jar and place it in your saucepan water bath on the lowest heat for 4-5 hours. This gentle warmth coaxes out the properties from those resilient leaves. Let it cool completely before handling.
Strain the oil thoroughly. The scent will be sharp, green, and wonderfully clarifying.
To use it, massage a teaspoonful into your scalp before your shower. Leave it on for 20 minutes, then shampoo as normal. You can also add a few drops of your infused oil to your regular shampoo bottle.
When to Seek Professional Help
Let’s be clear about what we’re making here. The herbal oils you infuse at home are wonderful for topical skincare, massage, hair treatments, and household uses. They are not medicines you ingest.
Your infused oils are for external support and should never replace advice from a doctor or a qualified herbalist.
If you have a skin condition like eczema or psoriasis that just won’t calm down, talk to a dermatologist. For any sign of infection-redness, heat, swelling, or pus-skip the home remedy and see a professional.
This goes for serious cuts or burns, too. An infused oil can be part of later care, but your first step is always proper medical treatment.
Finally, please patch test. Your skin is unique. I test every single new batch on the inside of my arm before it goes anywhere else.
Apply a dime-sized amount to clean skin, wait 24 hours, and check for any redness or itching. This simple habit has saved me from reactions more than once.
Other Options and Next Steps
Feeling inspired but not ready for a six-week infusion? Start with something instant.
A quick mint-infused olive oil for your kitchen is a perfect first project. Just chop a handful of fresh peppermint or spearmint leaves, warm them gently in a cup of olive oil for about 20 minutes, then strain. It’s fantastic drizzled over roasted vegetables or a summer salad.
Once you’re comfortable, try blending herbs in your jar. Lavender and rose petals together make a supremely calming skin oil. Rosemary and lemon peel create a bright, herbaceous blend for the hair.
I have a little notebook on my apothecary shelf where I jot everything down. The date I started a jar, which herbs I used, and how the oil turned out weeks later.
Keeping a simple journal transforms this from a one-time experiment into a reliable practice you can refine year after year. You’ll learn what works best for your own skin and home.
Quick & Practical Infusion Questions
How should I store my finished infused oils to make them last?
Store them in dark glass bottles in a cool, dark cupboard away from heat and light. This simple step is your best defense against the oil turning rancid and preserves the herb’s beneficial properties.
Can I use fresh herbs instead of dried?
I strongly advise against it because fresh herbs contain water, which will introduce moisture and almost certainly lead to mold in your oil. If you must use fresh, first wilt the herbs thoroughly for 24-48 hours to evaporate most of their surface moisture.
What is the very best oil for facial infusions?
For most faces, jojoba oil is the superior choice because it closely mimics our skin’s natural sebum, absorbs beautifully, and is non-comedogenic. Fractionated coconut oil is a close second for its lightweight, odorless, and non-greasy feel.
How long do homemade infused oils stay good?
Their shelf life depends on your carrier oil; a stable oil like jojoba can last over a year, while more delicate oils like sweet almond are best used within 6-9 months. Always label your bottle with the date and do a sniff test–if it smells sour or “off,” it’s time to compost it. For more tips on storing oils, check out our guide on the shelf life of botanical oils.
Is using a crock-pot really safe for infusing oils?
Yes, when done correctly using the water bath method described in the guide, which provides gentle, indirect heat. The critical rule is to always use the “warm” setting, never “low” or “high,” to avoid overheating and damaging the delicate compounds in your oil and herbs.
Nurturing Your Home Apothecary
The heart of a successful infusion is patience paired with quality plant material and a stable oil. Give your herbs time to fully impart their virtues into the oil, whether through the gentle heat of the sun or a low crockpot.
I hope this guidance empowers you to fill your own shelf with lovingly made creations. Trust your senses, start simply, and see where this joyful exploration into oils for body, skin, hair, wellness, and home takes you.
Sources and Additional Information
- How to Make Medicinal Herb Infused Oil: Two Ways ~ Homestead and Chill
- How to Make Herb-Infused Oils for Culinary & Body Care Use
- How to make herbal infused oils – School of Natural Skincare
- Easy Herb-Infused Olive Oil Recipe: A DIY Tutorial | Foodal
Noemi Kamińska
Noemi is an accomplished wellness researcher, nutrition care guide and body care expert. She has years of experience in formulating various oil combinations for full body wellness including face, hair, body care, essential oils and cooking oils. She works as a bio-formulator working with oil chemistry and analyzing the best formulations when it comes to your needs. Feel free to reach out to get your oil needs sorted.