Can Cooking Oil Season Cast Iron? The Polymerization Truth
You might have grabbed that bottle of vegetable oil for your skillet, worried it’s all wrong. Let’s settle this: the right oil matters, but so does knowing how heat transforms it into a slick, protective layer.
I’ll show you why polymerization is the real goal and how to pick a pantry oil that works. We’re covering:
- What polymerization actually does to your pan
- Which common cooking oils succeed (and which fail)
- My shelf-tested, simple method for a perfect season
Key Takeaways
Let’s get straight to the heart of the matter. The common kitchen myth isn’t entirely wrong, but it misses the nuance that makes all the difference.
Many Oils Can Work, But Some Are Champions
You absolutely can use some common cooking oils to season your pan. I’ve done it myself in a pinch. The real truth is that the chemical properties of an oil determine whether it creates a fragile film or a durable, slick surface that lasts. Think of it like choosing an oil for your skin. You wouldn’t use a greasy, unstable oil for your face if you wanted a clear, balanced complexion. The same principle applies to your cast iron.
Polymerization is a Transformation, Not a Burn
This is the most important concept to grasp. When you heat oil past its smoke point, it doesn’t just burn onto the pan. It undergoes a molecular change. The fatty acid chains link together, forming a hard, plastic-like coating bonded to the metal. Proper seasoning is about guiding this chemical reaction, not just creating baked-on grease. On my shelf, I have linseed oil for wood finishing. The same “drying oil” principle that protects a cutting board is what creates your pan’s non-stick shield.
Seek Stability and Dryness
The best seasoning oils share two key traits. First, high thermal stability, meaning they resist breaking down under heat. Second, a high level of polyunsaturated fats, which are eager to form those strong polymer chains. Oils that work well for seasoning often overlap with those prized in natural wood care and even some skin regimens for their protective, film-forming abilities. It’s a beautiful example of botany serving multiple functions in our homes.
Technique is Half the Battle
I learned this the hard way with a sticky, patchy pan years ago. You can have the finest oil available, but if you apply too much, it will turn gummy and weak. The single most critical step is wiping the oil on, then trying to wipe it all off again like you made a mistake. What remains is the perfect, microscopically thin layer needed for a smooth, hard polymer.
What You’ll Need for Cast Iron Seasoning
Gathering your tools is simple. You likely have almost everything already.
- Your Cast Iron Pan: Clean, dry, and ready. This process works for new bare iron or restoring an old piece.
- A High-Heat Safe Oil: This is our main variable. We’ll choose this carefully from options you may already own.
- Paper Towels or a Lint-Free Cloth: I keep a bag of dedicated, clean cotton rags in my kitchen for this and oiling wooden spoons.
- An Oven and Oven Mitts: Your kitchen oven provides the consistent, all-around heat needed for the initial seasoning layers.
Choosing Your “Main Variable”: The Oil
This is where your pantry and my apothecary shelf might overlap. We’re looking for an oil that won’t mind a serious workout. The oil’s smoke point threshold is its personal heat threshold, and we need to get close to it to trigger polymerization. Oils with very low smoke points will burn and smoke excessively before they can form a good layer. We’ll evaluate specific oils next, but think of it like choosing a carrier oil for a hot oil hair treatment. You need one that can handle the warmth without degrading. Consider oils like olive oil, avocado oil, coconut oil, canola oil, ghee, butter, and tallow—each with its own smoke point and suitability for high-heat frying. Choosing the right one matters for high-heat frying and flavor.
A Quick, Useful Word on Smoke Points
Don’t let this term intimidate you. An oil’s smoke point is simply the temperature at which it starts to visibly smoke and break down. For seasoning, we need an oil with a smoke point at or above your oven’s maximum temperature (usually 450°F to 500°F). This ensures the oil polymerizes efficiently without filling your kitchen with smoke. It’s a practical safety and satisfaction gauge, not just a chemistry note.
What Is Polymerization? The Simple Science of Seasoning
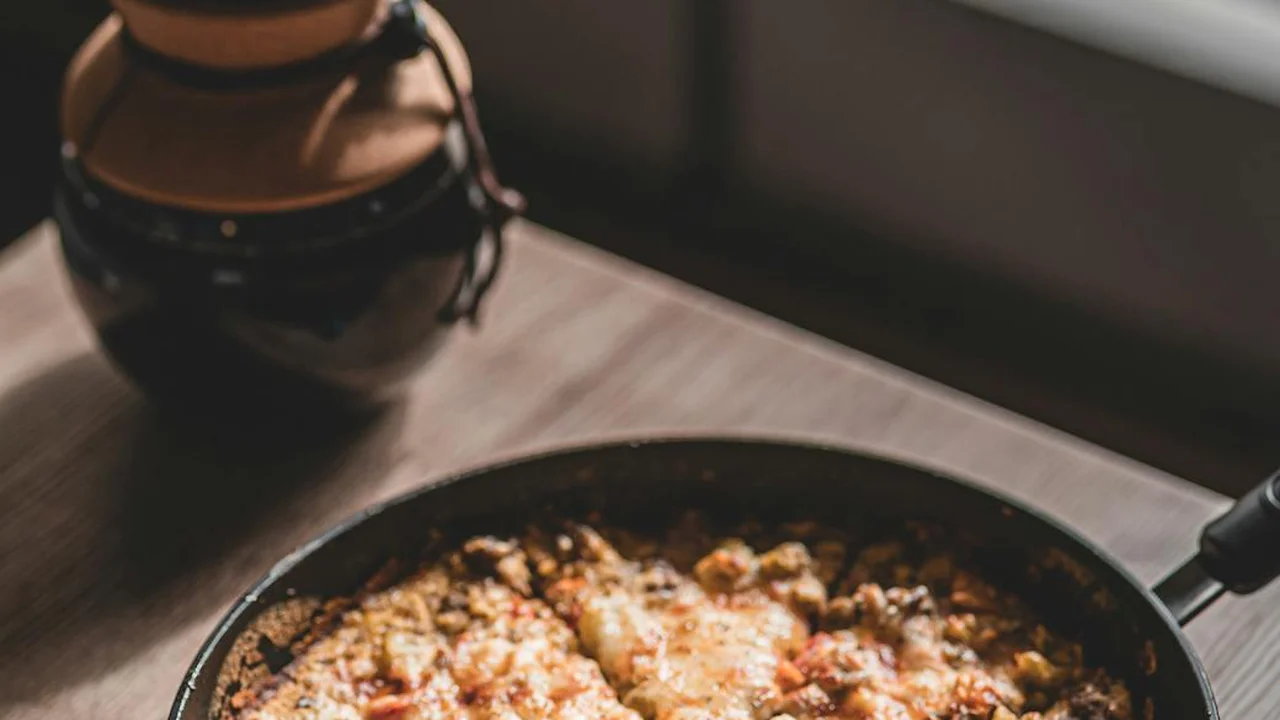
Think of polymerization as a magical transformation. It’s when the molecules in an oil link together into long chains and harden.
This creates a slick, durable coating that bonds directly to your cast iron’s surface. That hard, shiny layer on your skillet is not burnt gunk; it’s a plastic-like shield you built from oil.
I see this same process in my apothecary. Raw linseed oil, brushed onto a wooden spoon handle, will slowly dry rock-hard. It’s the exact same chemical reaction happening in your oven with your pan.
Heat and oxygen are the essential triggers. The heat provides the energy for the molecules to connect, while oxygen from the air helps solidify them. Your oil’s smoke point is the signal that this bonding process is beginning, not the finish line you’re aiming for. For example, grapeseed oil’s high smoke point supports high-heat cooking. We’ll examine its performance under high temperatures in the next steps.
When people search for ‘cast iron seasoning oil polymerization’, they often want to know what success looks like. A perfectly polymerized layer isn’t sticky or tacky. It feels smooth and slick to the touch, often with a deep, semi-gloss patina ranging from amber to black.
The Great Cooking Oil Debate: What Works and What Doesn’t
So, can you use cooking oil from your pantry? The short answer is yes, you often can. But the real answer is more nuanced.
Not all cooking oils are created equal for this specific job. The key lies in their fatty acid profile. Oils high in polyunsaturated fats, like flaxseed or grapeseed, polymerize very readily and harden fast.
Oils high in monounsaturated fats, like avocado or olive oil, also work but may take a bit longer. Common vegetable or canola oil, a kitchen workhorse, will get the job done and is a perfectly fine, accessible choice. Wondering whether vegetable oil or canola oil are the best substitutes for cooking and baking? This quick guide helps you decide.
I need to debunk a common idea. Many believe a very high polyunsaturated fat content is the ultimate goal. From my experience, oils like grapeseed can create a film that’s a bit brittle and may chip over time.
It’s a trade-off between speed of hardening and long term durability. For a cast iron seasoning oil substitute in a pinch, look for a neutral oil with little to no impurities. A basic canola or sunflower oil from your shelf is a trustworthy stand in.
Your Oil’s Smoke Point: A Guide, Not a Gospel
Let’s demystify the smoke point. In simple, sensory terms, it’s the temperature when your oil starts to visibly smoke and subtly change scent.
This is the oil beginning to break down, which is precisely what you need for polymerization to start. You must heat the oil past its smoke point to trigger the hardening, but there’s a fine line between polymerizing and burning.
If you see billowing, bitter smoke, the heat is too high. You’ll create a weak, sticky, or flaky layer instead of a strong bonded one.
Here’s a quick glance at smoke points for common seasoning oils. Think of this as a starting point, not a rigid rule, especially when you understand the science behind smoke points.
When considering ‘cast iron seasoning oil temperature’, you’re generally aiming for an oven temperature about 25-50°F above your oil’s smoke point. This gives it the energy to transform without incinerating.
Let your nose and eyes guide you as much as any chart. A thin, steady wisp of smoke is your cue that the magic is happening.
A Gentle, Step-by-Step Guide to Seasoning Cast Iron
Seasoning is not a chore. It’s a simple, mindful ritual to care for a tool that will care for you.
Think of it like preparing a good oil blend for your skin. You need a clean slate, the right ingredient, and a careful application.
Phase 1: Cleaning
Start with a completely clean, dry pan. If it’s new, wash it with warm, soapy water to remove the factory coating. Dry it immediately.
For an old pan, a good scrub with coarse salt and a drop of water works like a gentle exfoliant to lift debris without damaging the existing seasoning base.
Phase 2: Drying Completely
Water is the enemy of bare iron. Place the clean pan on a stovetop burner over low heat for a few minutes.
This drives off every last bit of moisture. You’ll see the pan go from wet, to dry, to just starting to feel warm to the touch.
Phase 3: Oiling (The Critical Step)
Take your chosen oil. Grapeseed from my kitchen shelf is my usual pick for this job.
Put a tiny amount-about half a teaspoon for a large skillet-into the warm pan.
Using a folded paper towel or cloth, spread the oil over every single surface: inside, outside, and the handle. Get it into every pore.
Now, take a fresh, clean cloth or paper towel. Buff the pan as if you are trying to completely remove all the oil you just put on.
Wipe until the pan looks almost dry, like you changed your mind. This impossibly thin layer is the secret.
Phase 4: Heating & Polymerizing
Place the oiled pan upside down in a cold oven. This stops oil from pooling in the bottom.
Put a sheet of foil on the rack below to catch any tiny drips. Set your oven to 450°F (232°C).
Let the pan heat for one full hour at this temperature. You might smell a light, nutty scent as the oil cures. This is the polymerization happening.
Phase 5: Cooling Completely
When the hour is up, turn the oven off. Do not take the pan out.
Let it cool down slowly inside the oven until it is completely room temperature. This slow cool helps the layer set firmly.
Phase 6: Repeating
One layer is a good start. Three to five thin layers build a robust, durable foundation.
Simply repeat the oiling, heating, and cooling process two to four more times. Your patience here builds a lifetime of easy cooking.
How to Apply the Oil: The “Less is More” Method
Warm your clean pan slightly. This makes the oil more fluid, like warming coconut oil before applying it to your skin.
Add just a few drops. Use your cloth to spread it into a faint, shiny film across the entire surface.
Now, buff vigorously with a clean section of the cloth. Keep wiping until the pan has a dry, matte look with only the faintest hint of slickness.
It’s exactly like applying a precious facial serum. You use a pea-sized amount for your whole face because more would just sit on top and feel greasy.
Identifying and Fixing a Sticky or Burnt Layer
If your pan feels tacky or has blotchy, dark spots after seasoning, you used too much oil.
The thick layer couldn’t fully polymerize and instead baked into a gummy, uneven coat.
Don’t worry. This is a common and totally fixable moment. You can gently strip this layer and start over.
Scrub the pan very well with hot water, a stiff brush, and a little soap. For a more stubborn sticky layer, a paste of coarse salt and water works as a gentle abrasive.
If the layer is burnt and carbonized, you may need to use a chainmail scrubber to remove the flakes. Then, just begin your gentle seasoning ritual again with an even thinner layer of oil.
Common Cast Iron Seasoning Myths, Calmly Debunked
Let’s clear the air on a few things you might have heard. A calm approach always works best.
Myth 1: “You must use flaxseed oil for a glassy finish.”
Flaxseed oil does create a hard, beautiful finish. I’ve used it.
But that hardness can come with brittleness. It can chip or crack more easily under thermal stress, like a ceramic coating that isn’t flexible.
Oils like grapeseed, sunflower, or even a classic Crisco are more forgiving and durable over time. They create a tough, flexible coating that heals as you cook.
Myth 2: “The oil should smoke heavily the whole time.”
Some smoke is normal as the oil reaches its smoke point and begins to transform.
Billowing, continuous smoke means the heat is too high and you are burning the oil instead of polymerizing it.
You want a stable, moderate heat that cures the oil. If your kitchen gets smoky, your temperature is likely too high.
Myth 3: “Any oil will eventually polymerize if you cook with it enough.”
While regular cooking does add to your seasoning, it’s a haphazard method for building the initial foundation.
Without the controlled, even heat of the oven process, you risk uneven spots and weak layers. The deliberate first few layers set the stage for everything that follows.
Myth 4: “Seasoning makes the pan totally non-stick like Teflon.”
A well-seasoned pan is naturally release-friendly, but it’s not a synthetic non-stick surface.
It still benefits from preheating, using adequate cooking fat (like butter or oil), and letting food sear before you try to move it.
Think of seasoning as creating a smooth, protected canvas. Your cooking technique and use of fats are the brushes that create the non-stick masterpiece.
Choosing Your Seasoning Oil: A Botanical Perspective
Not all oils create an equal finish on your pan. The best choices are ones that polymerize reliably, meaning they cure into a hard, slick finish when heated.
I look for oils with a high smoke point and a good balance of polyunsaturated fats, which are more eager to form those strong, bonded layers. From my shelf to yours, here’s how some common oils perform.
Grapeseed Oil
This is my personal favorite for seasoning. It has a moderately high smoke point and a very thin, almost dry texture that makes it easy to apply in a microscopically thin layer.
Grapeseed oil polymerizes into a remarkably tough, clear finish. I keep a bottle in my kitchen specifically for my cast iron skillets.
Its lightweight, non-greasy nature is exactly why it’s also a star ingredient in my homemade facial serums and hair oils. The same bottle can truly do double duty.
Avocado Oil
Pressed from the fruit’s flesh, avocado oil boasts one of the highest smoke points of any plant oil. This makes it exceptionally stable under high heat during the seasoning process.
It creates a durable coating, though it can sometimes leave a slightly thicker film if you apply too much. A little goes a very long way.
Just like for your pan, that high-heat stability and rich moisturizing quality make it fantastic for protecting hair from heat styling or as a deeply nourishing body oil after a shower.
Flaxseed Oil (Linseed Oil)
Flaxseed oil has a legendary reputation in some circles for creating a glass-like, professional finish. This is because it’s a “drying oil,” similar to what’s used in traditional wood finishes.
It polymerizes very hard and very quickly. That sounds perfect, but it’s also the potential downside.
That hard finish can become brittle over time and with thermal stress, leading to flaking more easily than other oils. It also has a shorter shelf life and can go rancid quickly in your cupboard.
Coconut Oil vs. Olive Oil
Highly refined coconut oil, with its high smoke point, can work reasonably well. It’s stable and forms a decent layer.
I avoid unrefined (virgin) coconut oil for seasoning because its lower smoke point and impurities can lead to a sticky residue. Understanding the key differences and benefits between virgin and refined coconut oil across skin, hair, and cooking can guide when each is best. Extra virgin olive oil, while a kitchen hero, has a low smoke point and a high percentage of monounsaturated fats that don’t polymerize as efficiently.
It often leads to a gummy or tacky finish on your pan. Save your good olive oil for dressing salads and finishing dishes.
Top Choices for Reliability
For a balance of ease, results, and versatility, I consistently return to a few favorites.
- Grapeseed Oil: My top pick for its user-friendly application and rock-solid finish.
- Avocado Oil: Excellent for high-heat stability and a great multi-use oil.
- Sunflower or Safflower Oil (High-Oleic): Readily available, affordable, and very effective. Look for “high-oleic” on the label for better stability.
For most home cooks, a simple, inexpensive bottle of high-smoke point vegetable oil like grapeseed or safflower is the most reliable path to a perfectly seasoned pan.
Oils from the Kitchen vs. Oils from the Apothecary Shelf
The line between these two spaces is beautifully blurry. The same chemical properties that make an oil good for your skin or hair often make it suitable for your cookware.
We choose cooking oils for flavor and stability at high heat. We choose body care oils for their fatty acid profiles and how they absorb into our skin.
Seasoning a pan asks an oil to do something different: to transform under heat from a liquid into a solid, bonded coating. This “drying” ability is key.
An oil like grapeseed is a perfect bridge. In the kitchen, it’s a neutral-tasting fat for sautéing. On my apothecary shelf, it’s a light carrier oil for essential oils. And for my cast iron, it’s a premier seasoning agent.
That single bottle of food-grade, cold-pressed grapeseed oil is genuinely perfect for making a simple pan sauce, whipping up a nourishing skin serum, and maintaining the classic black patina on your favorite skillet. It’s a wonderful example of botanical simplicity.
Quick Answers from a Plant Friend
Can I use any oil from my kitchen as a cast iron seasoning oil substitute in a pinch?
Yes, a neutral oil with a high smoke point, like sunflower or canola oil, is a perfectly good substitute. The key is that it’s refined and free of debris, similar to how you’d choose a simple, pure oil for a sensitive skin application.
I’ve seen cast iron seasoning oil smoke point charts-how strictly should I follow them?
Use a smoke point chart as a helpful guide, not a rigid rule. Your goal is to heat the oil just past its smoke point to trigger polymerization, not to hold it at a precise, charted number-trust a steady, light wisp of smoke as your true cue.
What does “burning off” seasoning mean, and how do I avoid it?
“Burning off” happens when heat severely degrades the polymerized layer, often due to excessive, direct high heat without any cooking fat. You avoid it by always preheating your pan gradually and using adequate oil or fat when cooking, just as you’d protect skin with a barrier before heat exposure.
Is there a single “best” cast iron seasoning oil from your botanical perspective?
For a superb balance of durability, ease, and multitasking ability, my shelf vote goes to grapeseed oil. It polymerizes beautifully into a tough finish and, like a good carrier oil for skincare, is lightweight, stable, and wonderfully versatile for home and body.
Caring for Your Cookware with Plant-Based Oils
Stick with a high-quality drying oil, like flaxseed or refined avocado, to build a durable polymerized layer on your cast iron. This simple switch from everyday cooking oils nurtures your pan with a natural, resilient finish that lasts. If you’re shopping for avocado oil, choose a pure, high-quality, cold-pressed option suitable for both cooking and skincare. This ensures you get maximum purity and versatility from your oil.
Follow along here for more practical wisdom on using oils for body, skin, hair, wellness, and home. Trust this guidance and your own hands as you experiment, creating a kitchen that feels both nourishing and true.
Expert Resources and Citations
- Demystifying Cast Iron: Heat and the Polymerization of Oil | Colors, by Kael Shipman
- r/castiron on Reddit: How does polymerized oil bind to the cast iron surface?
- Science of Cast Iron Cooking
Noemi Kamińska
Noemi is an accomplished wellness researcher, nutrition care guide and body care expert. She has years of experience in formulating various oil combinations for full body wellness including face, hair, body care, essential oils and cooking oils. She works as a bio-formulator working with oil chemistry and analyzing the best formulations when it comes to your needs. Feel free to reach out to get your oil needs sorted.